Here we go, a look through the the main (kid) bathroom before & after for you today! This was a small and (extremely) budget friendly fix to a room we really added to our list at the last moment during the renovation of our home this year. The truth is, I wasn't going to touch this room at first for fear of a snowball effect in terms of cost. But now that we 'bit the bullet' and finished it off, I couldn't be happier.
So really this had to meet 3 criteria: (1) be kid friendly and *mostly* indestructible, (2) have traditional and classic finishes that can grow up with the little when he's not so little any more. I wanted to be able to switch out the mirror, accessories etc. to accomplish a more adult look later in the future, (3) be as tight on budget as POSSIBLE.
You know where we always have to begin - the befores!! Here's a wide-angle realtor shot of this 1989 wallpaper-clad gem:
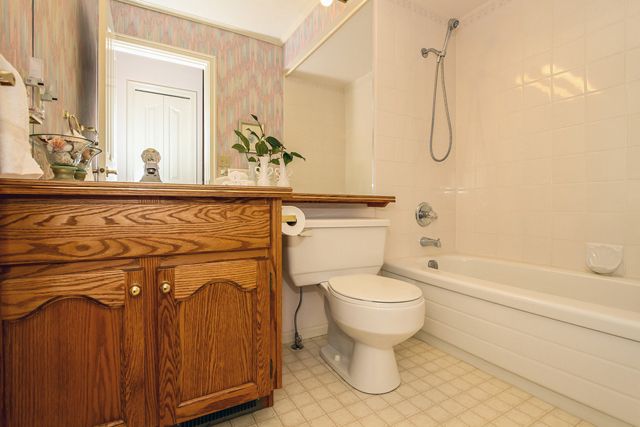
We were dealing with linoleum, honey oak cabinetry, pink wallpaper, and a few flowery tiles bordering the top of the shower. From our first walk through the house, I remembered thinking, 'oh, that's not so terrible to live with, the shower is simple and all-white!' Wrong. Upon second inspection I realized there are flowers bordering the top (funny the details you miss during a first walk-through, hey?):

There was one other thing I wanted to make sure to get rid of if I was tackling this project, the bulkhead above the shower (there was no piping hiding in there to be moved, so it turned out to be an easy fix!):

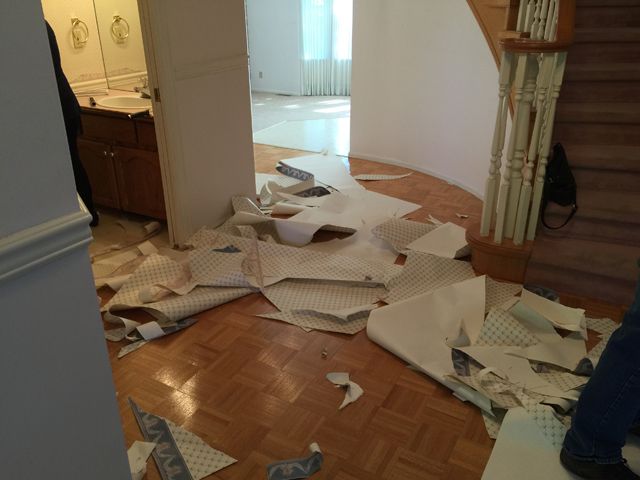
There was no choice but to start from (almost) scratch:

Phew, that was a relief to see all of that go!
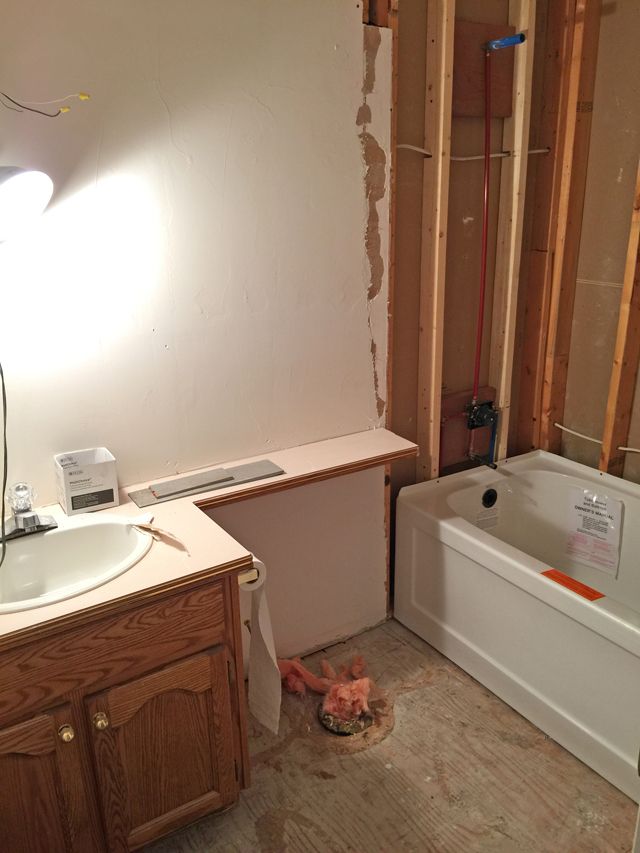
We actually got rid of the builder-basic mirror, toilet, counter, and replaced the tub in the above photo as well. I really wanted a flat 'apron' with a modern appearance for the tub front, and this one was very budget friendly. Really the only thing to stay was the box of the cabinet; we opted to replace only the doors with new ones and paint the unit out ourselves, which literally ended up feeling like a new cabinet for under $200. And, with the drywall ceiling drop removed within the shower, the new tile could go all the way to the ceiling.
Here is the mood board I mapped out with the design direction I was taking:
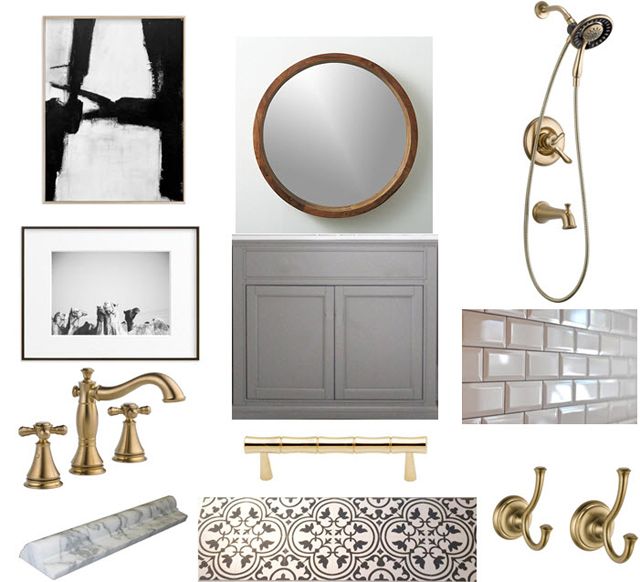
Minted artwork (Gentle Embrace and Leader of the pack) | CB2 Acacia round mirror | Delta Faucet Linden Monitor 17 series shower | Delta Faucet Cassidy widespread lavatory | Creekside beveled subway tile and Carrara marble chair rail | Rejuvenation Kanota drawer pull | C&S Hydraulic tile | Delta faucet Cassidy robe hooks
A little reminder of the full-effect before:

Compared to the after (all the lovely after photos by Tracey Ayton Photography):

And a progress shot:

With the same angle after:

A decent difference from our starting point! This space now feels fresh, and fun for a kid too. Seeing as Marcus is half Egyptian from my side of the family, the camel art from Minted seemed totally logical :) I also picked out an abstract piece with a brass frame to complement the plumbing fixtures. I really love how easy it is to choose and visualize different frames on their website.

I adore the champagne bronze finish of the Delta Faucet the fixtures, it adds such warmth! And maybe even more importantly this finish has proven to be amazing against finger prints/dirt. Let's be honest, I love polished nickel but with the way it shows every mark I am glad I didn't select it for a room with little fingers!! The Cassidy collection I selected from has the traditional vibe (especially with the cross handles on the faucet) that I was going for and is in keeping with the rest of the house. For that reason I feel like this is a "kid" bathroom that a child can truly grow with.


And as pretty as it is, this is a hard-working shower head you can pull down and hose the kiddos down with:

We've taken the beveled subway tile and Carrara marble chair rail all the way around the room at a 42" height. We finished off the edge of the shower tile with a matching Carrara marble pencil trim. Though some might say I'll be a goner with the white grout, I purposefully chose a tight grout line, and I think it would be fairly easy to re-grout over top after years of wear & tear.

I know this may sound silly, but honestly even changing out the tank lever made a huge difference in creating a polished and cohesive look. When this was the basic 'chrome' plastic handle that came with the toilet, my eye was sooo drawn to it, in a bad way! It's those little details that make the design.


Thank you again for following along on this journey with me! Xo
Here is a full list of products used in this project:
Delta Faucet Linden Monitor 17 series shower
Delta Faucet Cassidy widespread lavatory
Minted artwork: Gentle Embrace by Ilana Greeberg
and Leader of the pack by Heather Marie
Shades of Light Beaker Glass bath light
Creekside beveled subway tile and Carrara marble chair rail and pencil trim
Rejuvenation Kanota drawer pull
C&S Hydraulic tile
Delta faucet Cassidy robe hooks and towel ring
Delta faucet Cassidy tank lever and tissue holder
Carrara marble counter top
Home Depot Bath tub, toilet, and curtain rod
Benjamin Moore Wickham Gray on the walls/Coventry Gray on the cabinet
Delta Door Shaker cabinet doors
Joss & Main Turkish bath towel
Pottery Barn Shower curtain
HomeSense Counter accessories
Flowers by Flowers and Company