Thursday, December 17, 2015

Reno Project Update | Entry Progress


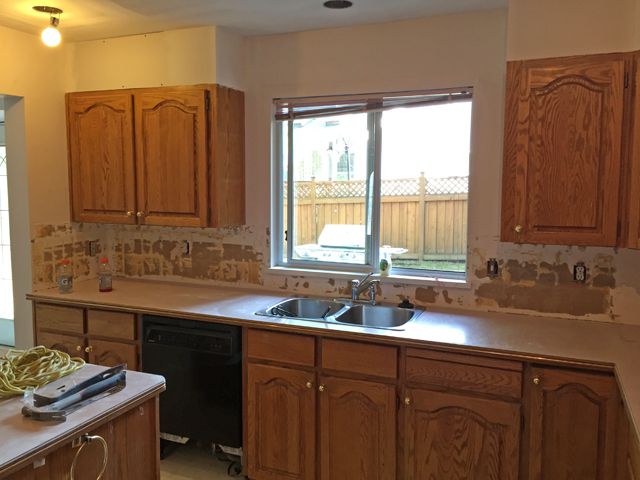
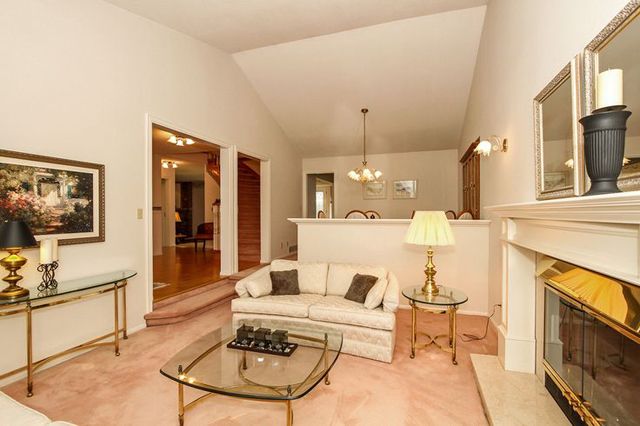
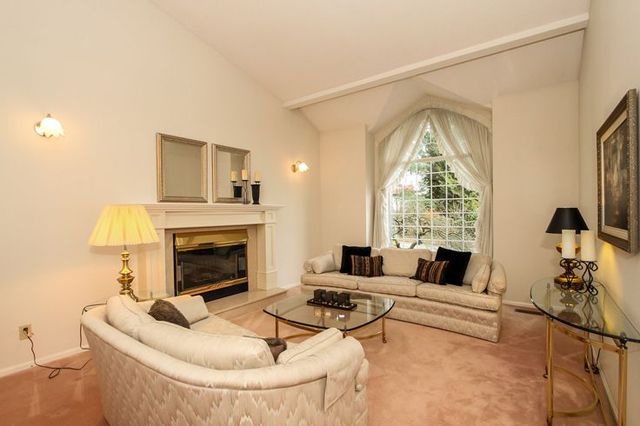
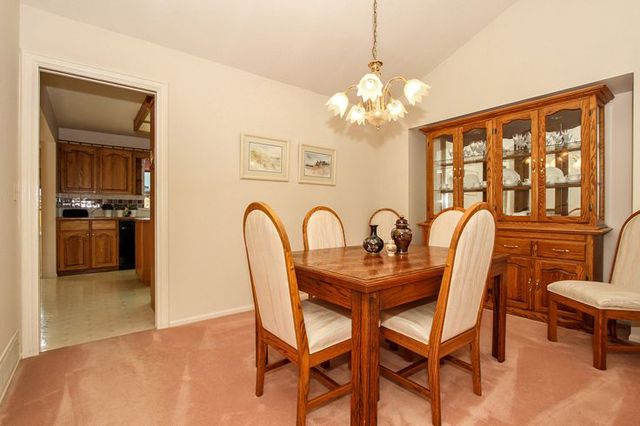
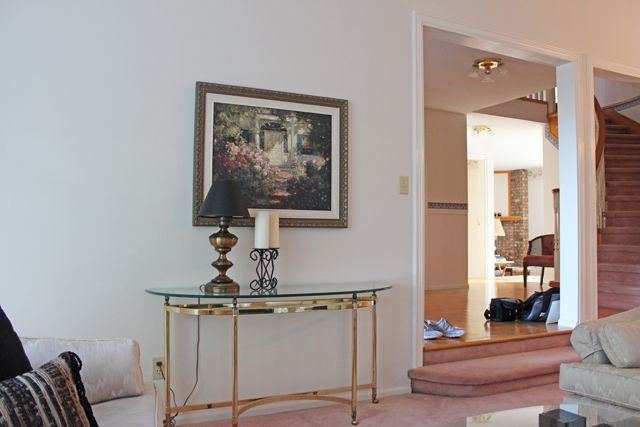
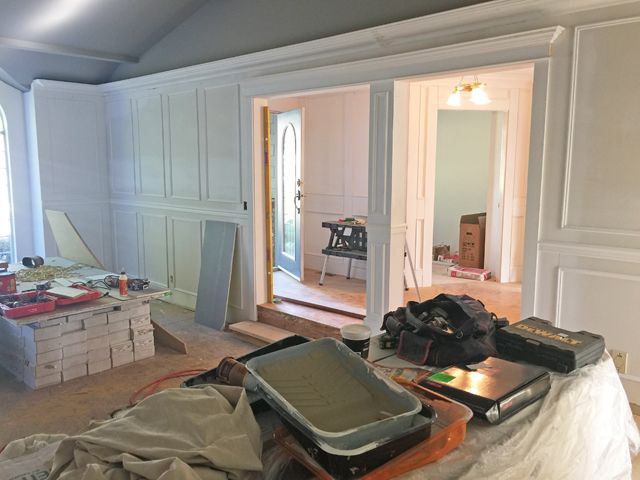
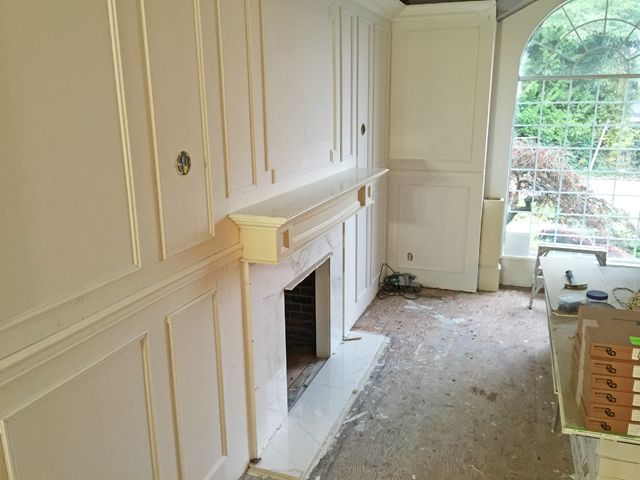
Another project update for you today! I'm sharing the before's & progress shots of the entry way of this lovely little 1989 gem :) Above is a photo of the space before we got our hands on it - complete with wallpaper, borders, pink carpet and honey oak. We knew we wanted to add structure and 'good bones' to totally recreate the first space you see when you enter the house. Trim and interior finishings would do just that! So I got to drawing up my vision, in a very amateur and non-AutoCAD way (ie. random scraps of paper):


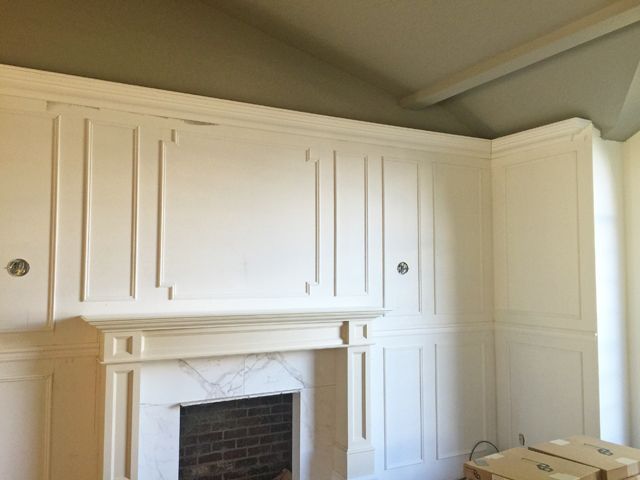
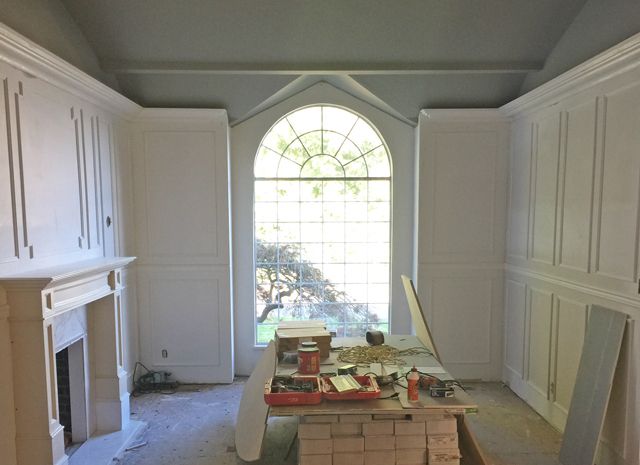
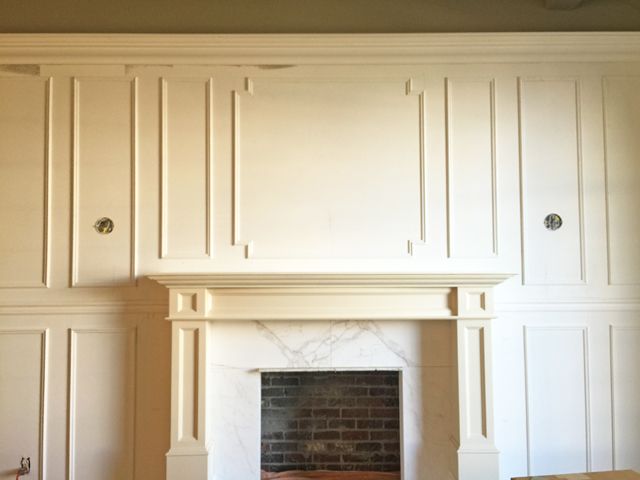
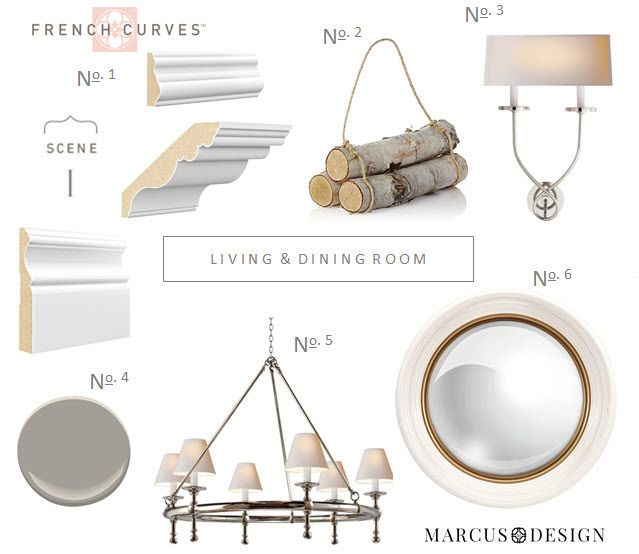
I knew that the dated curved staircase wall had the potential to be a show-stopper. Just needed the ingredients to get it there. In came a truck-load of trim from Metrie, oh happy day! We selected a gorgeous panel mould combined with flat stock to create a recessed look, I love love love the profile and high-quality of the trim we chose!


We got to planning out and prepping the space. I decided to paint the banister and just the horizontal footings in a deep brown (Benjamin Moore's Black Bean Soup) - I was very proud of my meticulous taping job :) Everything else would get a nice fresh coat of BM's Chantilly Lace.


It's amazing what you can do with flat stock on a curved wall! Our fabulous trim guy Mark notched out so many points that we were able to literally bend MDF:

 
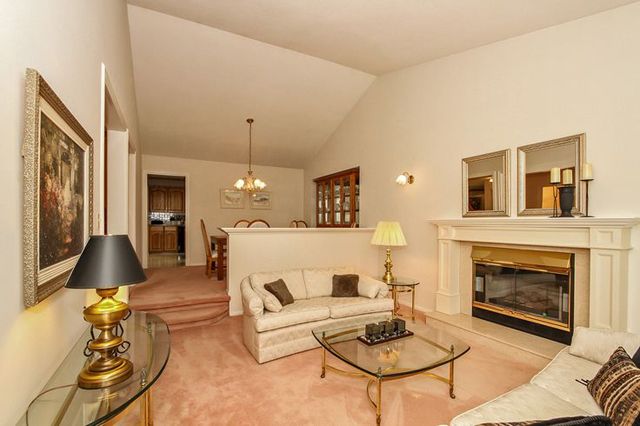
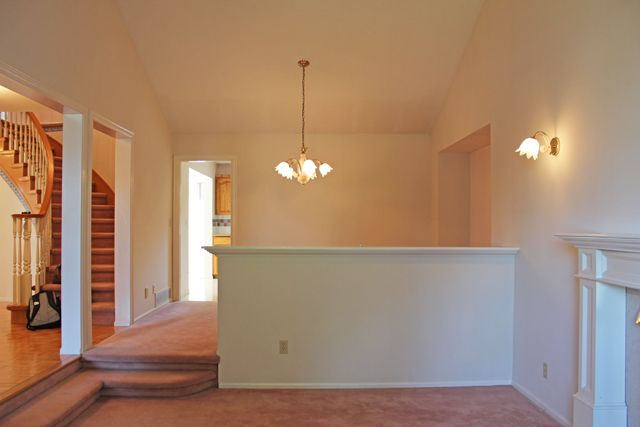
Ok, so cue the dramatic music - another before shot in it's 'honey-oak glory':
 
 
Banister sanded and sanded and sanded:
 
 
And a nice new lick of paint!
 
 
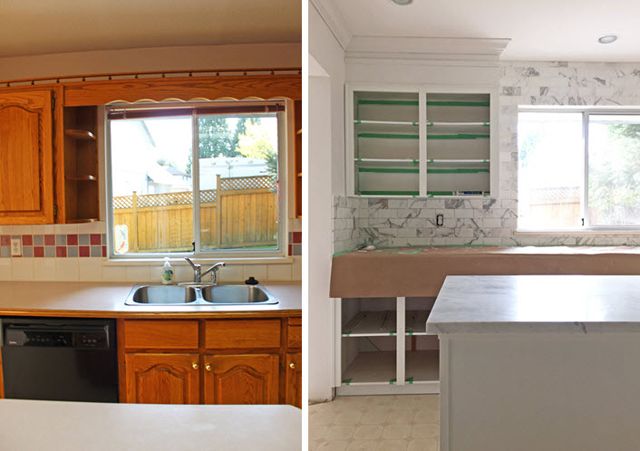
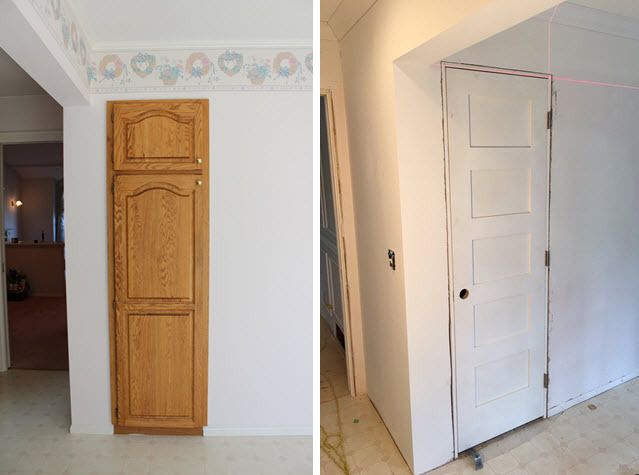
We hummed and hawed over the idea of staining the banister but after lots of research we figured out that we could get the look we wanted to achieve with paint and 2 clear polyurethane coats. I am happy with the results and it was much faster and easier. We've yet to add the flooring, baseboards, and lighting to the space. Here's a peek into the powder room, before & after:


The old doors got a coat of paint as well, a budget-friendly option! (Sherwin Williams Black Magic):
 

Front exterior door was replaced with a solid fir door that I am quite thrilled with. We lost light coming through, which I realize many people would hate to do, but for me privacy was more important (Sherwin Williams Tricorn Black):


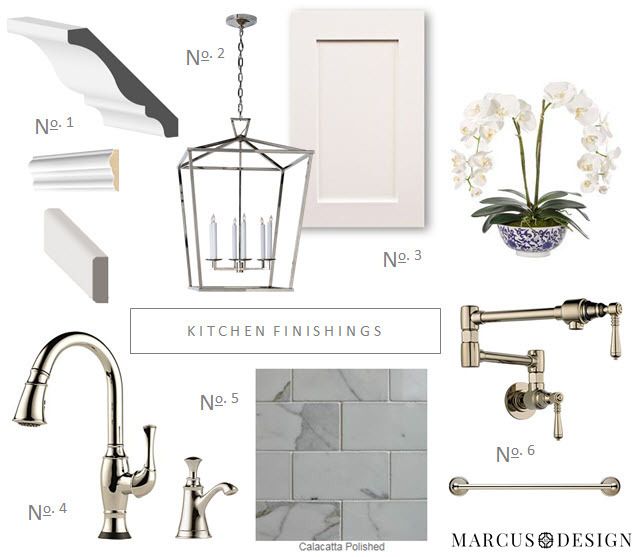
Here's a peek at a few other things about to go into this space, we've selected a lovely patterned wool carpet for the stairs, a medium brown oak wood flooring, and these gorgeous ceiling fixtures from Shades of Light.


I'll share the final space when it all comes together! You can hop back to see our living room and kitchen progress in case you missed them.

Thanks for taking the time to check out the progress, you can follow along with current updates on my instagram account as well ;)
 

PINTEREST    |    INSTAGRAM    |    TWITTER    |    FACEBOOK    |    BLOGLOVIN

Tuesday, December 15, 2015

Our Winter Babe Is On The Way


Our little family of two is about to grow! I can't believe I'm in week 37 of pregnancy as of today. Time has flown by with this reno taking place, but we simply had to pause, soak it in, and try to capture the moment with a maternity photo session. It's been so hard to just stop and realize all that is going on around us. And as of about 2 weeks ago we've learned that baby is in a breech position and this may mean an earlier arrival via C-section. I'm still praying he'll turn around but I'm also realizing it's all in God's hands and I'm just going to take it one small step at a time.
 
Here's a little tid-bit of our photos for you (by Trina Lianne):


Thanks for coming along this journey with me! More updates on baby & reno to come soon :)
 

PINTEREST    |    INSTAGRAM    |    TWITTER    |    FACEBOOK    |    BLOGLOVIN

Monday, November 23, 2015

Reno Project Update | Kitchen Progress (With a DIY Twist)


Another week, another progress post for you! This time I'm honing in on the kitchen - the heart of the home. Above you can see the real estate photos as the kitchen appeared when we toured & purchased the house. Fairly typical layout, wood box fluorescent lighting, and the same oak cathedral-style cabinets that I had to tackle in my last home! They're following me!!


You can see the kitchen is separated by a bit of a partition in the wall, however due to the fact that this is a load-bearing archway, we opted to leave it alone as we knew our budget was tight. The kitchen is a space that can suck-up budget money (and fast!) so I knew I had to get creative on a few aspects in order to make it work without blowing it all in one space. The kitchen really turned out to be a lesson in learning which items to save on and which to splurge on to get the highest design and function impact, and of course the most bang for our buck.


Above you can see a spanned out view past the archway, there was this super-awkward and random cabinet door off on one wall (to the very right of the image), that opened into a mini-pantry. It looked totally out of place! Another problem to tackle. And of course one of the first things to go was the box-lighting:


Then we started to rip out portions of the cabinets, the little open shelves on either side of the window, and the decorative wooden-dowel railing off the top:


So now to get crafty. I couldn't afford all new cupboards, and I hated the empty space above the cabinets! Enter in my father-in law who just so happens to be a dry waller and was kind enough to appease my crazy ideas. We boxed in the cupboards to the ceiling with drywall!


And now for the dramatic side-by-side, we wanted this boxed-in drywall header to appear as a natural extension of the cupboards to the ceiling, so with the help of Metrie and their incredible trim and mouldings, we created a polished and modern look using a crown, panel mould, and screen mould build-up:


The trim finishings will also be wrapped around the cabinet on the far left to meet flush with the new Calacatta backsplash. We painted everything out in BM Chantilly Lace, and ordered new oak shaker-style door fronts (and at a whopping $1200, this budget-friendly alternative was a steal!).


Another close up of those gorgeous Metrie pieces, we utilized 4 1/4" crown, combined with French Curves Collection panel mould.


Bright pot lights in place, and a lovely marble island counter that I'm sure we will stain like crazy, but I'm so excited to have!


This spot is going to have the wooden stove hood returned once painted, and a stunning jewelry-like Brizo Traditional pot filler on the wall! I can't even believe I'm going to have my very own pot-filler, is it weird to say that that's the stuff kitchen dreams are made of? It'll be paired with the new SmartTouch Technology faucet that I so cannot wait to test out, no more dirty hands touching the faucet lever!


I've also got French doors going in within the eating area, more on that to come soon! I plan on a little DIY using a frosted self-adhesive product from d-c-fix that can be removed and reapplied multiple times without leaving any sticky stuff behind.


The yucky pantry door before & after - we chose a Masonite wood 5 panel shaker door to keep things looking clean and modern:


Some of the items going into our kitchen space are linked below, more to come soon! Thank you for following along with our adventures in renovating ;)


No. 1 - Metrie 4 1/4" crown combined with French Curves Collection panel mould trim and pine screen mould | No. 2 - Circa Lighting Darlana Lantern | No. 3 - Shaker cabinet fronts | No. 4 - Brizo Talo SmartTouch Technology faucet & soap dispenser | No. 5 - 3x6 Calacatta polished tile | No. 6 - Brizo Traditional pot filler and Traditional 18" towel bar

PINTEREST    |    INSTAGRAM    |    TWITTER    |    FACEBOOK    |    BLOGLOVIN

Monday, November 16, 2015

Reno Project Update | Living & Dining Room Progress


Here we go everyone! A post LOADED with before & progress shots for you today (finally!). It's been mayhem between growing a baby, working full-time, and climbing this mountain they call "renovation." Just for future reference, these things should never be combined - scary stuff my friends, scary stuff.

All jokes aside, we are finally feeling like we are getting somewhere :) I want to start with the beginning of the story for the living/dining space - a large scale room that you see immediately to your right when entering the front door of the home. Here are the legit 1989 befores (the real estate photos we viewed when purchasing the home back in May):


Ok - so now you get the feel for the awkward step down, the pony wall separating the two spaces, the big bare-ness of the vaulted ceilings with zip-zero soul or personality. I think that was the point that bothered us the most, this was a large space, with loads of potential but it appeared so bare and boring with literally NO architecture. This quickly became our main plan and priority for the room! In our last home, we saw that the efforts we put into panelling a few feature walls was a huge appeal, and a major selling feature that we strongly believe got us the most bang for our buck, an investment that was so worth it.

First thing to get knocked out was that darn pony wall:


We rebuilt the step going all the way across the room instead (imagine these all covered in gorgeous oak wood flooring!!):


Carpets were of course ripped up, and the gas fireplace insert was removed. Lucky we pulled it out as we discovered a water leak in desperate need of repair. That's the not so pretty part of renovating, and it's been bumps in the road like these that have really added to our overall timing.

We chose to conserve the old mantel as it is in good condition, and with a new brighter white coat of paint I think it's going to work well with our vision:


Notice how far apart the sconces were on either side of the mantel? It was too widespread for my liking so I had our electrician bring them in closer on either side before we closed everything up with drywall again:


Then I started my hunt for inspiration. There are so many things you can do with a vaulted ceiling, I wanted to try something a bit different, not just faux wood beams, or bead board as you've likely seen in many spaces. Paint out the ceiling, create a tray ceiling that breaks up the wall with crown, and go heavy on the trim and moulding on the lower portion of the wall - these were just the interior finishings we needed!

So we had the core of our plan, and we set out to execute it using the French Curves Collection from Metrie. Scene I of this collection suited exactly what I was looking for, young-traditional style with a perfect mix of ornate and contemporary elements. We chose a large-scale crown to encircle the entire room and began to panel the lower half with panel moulding. So for dramatic effect, remember it without any trim:


And now that same corner, voila!


We are head over heels in love with the transformation, and it hasn't even been filled or painted out white yet!!


We added a little bit of framing detail above the fireplace similar to what you see in the photo below, I think that is the fun of planning and creating with trim and moulding, you can really let yourself get creative!


And even with an all-grey ceiling, the white will keep the room fresh and lively (I've selected BM Chantilly Lace which will be going up soon!).


We are actually planning on leaving the fireplace non-functional but pretty for now, so in the coming weeks I'm going to be styling it up with sconces and birch logs much like this one from Club Monaco in NYC:


Can you picture it all? Here's a bit of a mood-board of my continued plans for this space so you can get a feel for where I am headed with it, much much more to come soon! And stay tuned for an update on kitchen progress in the coming week.


No. 1 - Metrie French Curves Collection Scene I, 7 1/4" Crown, Panel Mould, and 5 1/2" Baseboard | No. 2 - Crate & Barrel birch logs | No. 3 - Circa Lighting Symmetric Twist sconce | No. 4 - Benjamin Moore's Escarpment | No. 5 - Circa Lighting Classic Ring Chandelier | No. 6 - Lamps Plus Convex mirror


PINTEREST    |    INSTAGRAM    |    TWITTER    |    FACEBOOK    |    BLOGLOVIN
Related Posts with Thumbnails
 

© 2010-2017 Nancy Marcus. All Rights Reserved. | Blog Design By Brittany Douglas