


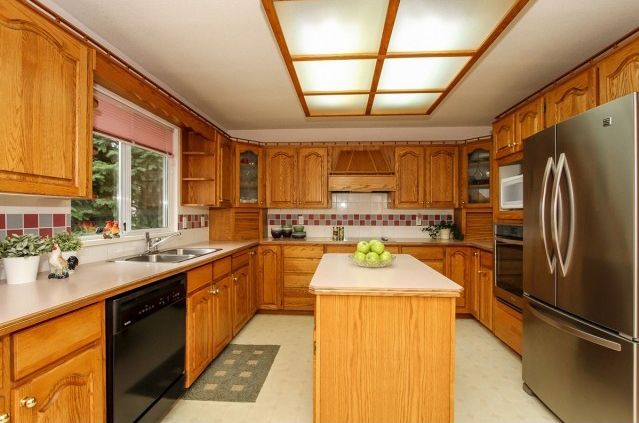
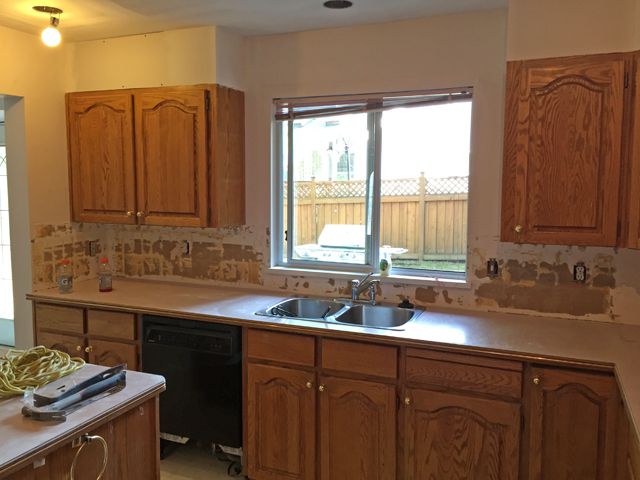
Another week, another progress post for you! This time I'm honing in on the kitchen - the heart of the home. Above you can see the real estate photos as the kitchen appeared when we toured & purchased the house. Fairly typical layout, wood box fluorescent lighting, and the same oak cathedral-style cabinets that I had to tackle in my last home! They're following me!!
You can see the kitchen is separated by a bit of a partition in the wall, however due to the fact that this is a load-bearing archway, we opted to leave it alone as we knew our budget was tight. The kitchen is a space that can suck-up budget money (and fast!) so I knew I had to get creative on a few aspects in order to make it work without blowing it all in one space. The kitchen really turned out to be a lesson in learning which items to save on and which to splurge on to get the highest design and function impact, and of course the most bang for our buck.

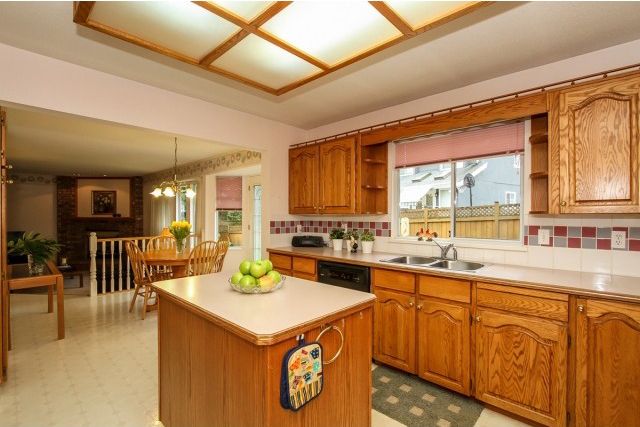
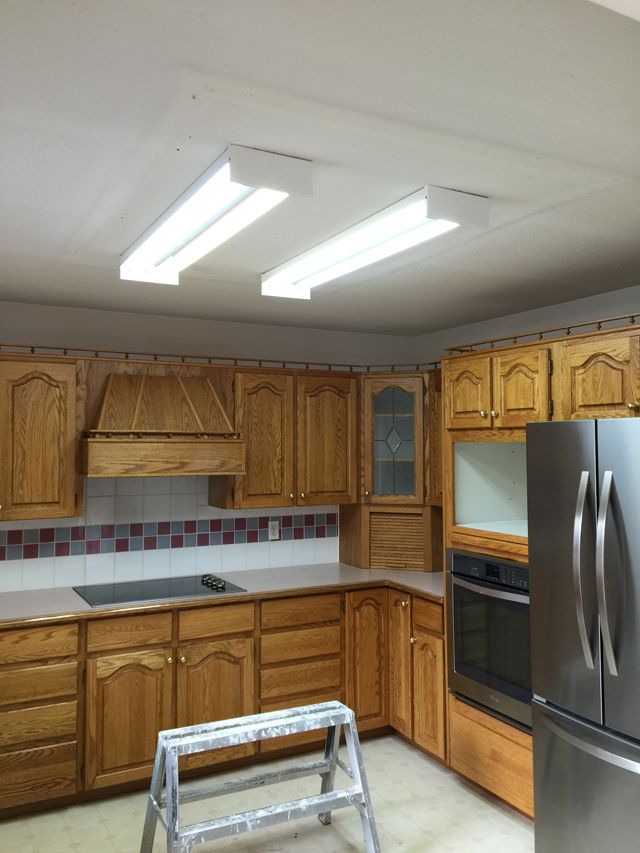
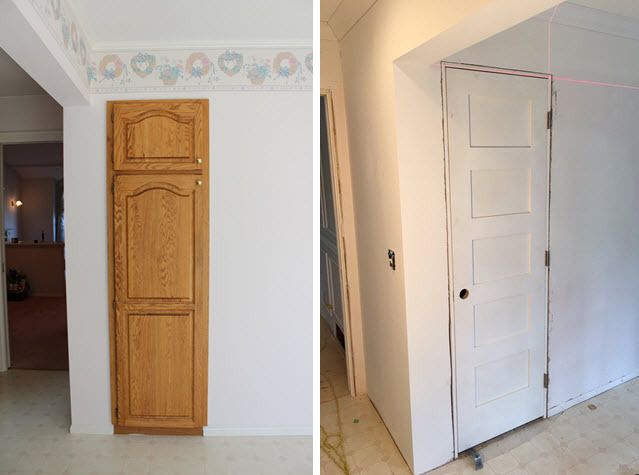
Above you can see a spanned out view past the archway, there was this super-awkward and random cabinet door off on one wall (to the very right of the image), that opened into a mini-pantry. It looked totally out of place! Another problem to tackle. And of course one of the first things to go was the box-lighting:
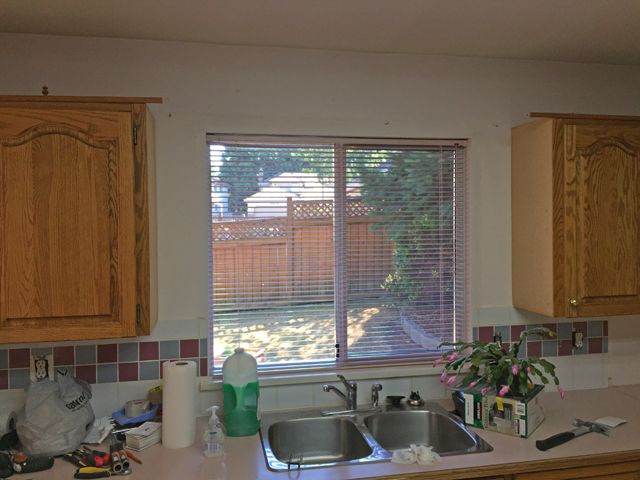
Then we started to rip out portions of the cabinets, the little open shelves on either side of the window, and the decorative wooden-dowel railing off the top:
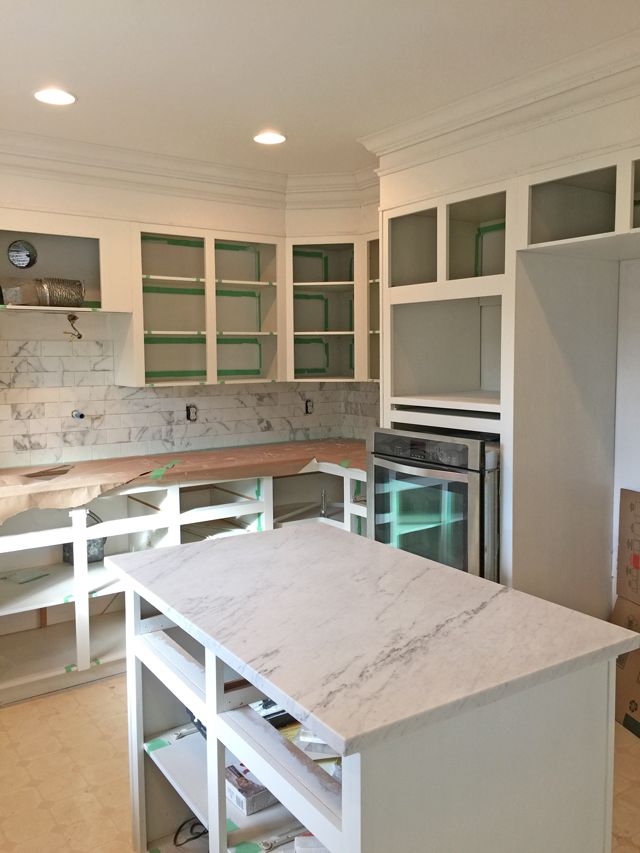
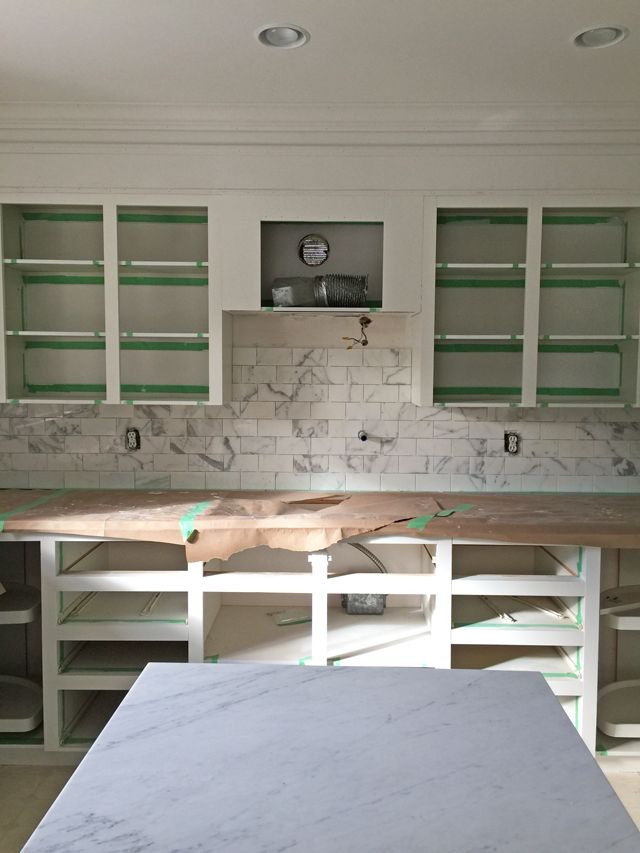
So now to get crafty. I couldn't afford all new cupboards, and I hated the empty space above the cabinets! Enter in my father-in law who just so happens to be a dry waller and was kind enough to appease my crazy ideas. We boxed in the cupboards to the ceiling with drywall!

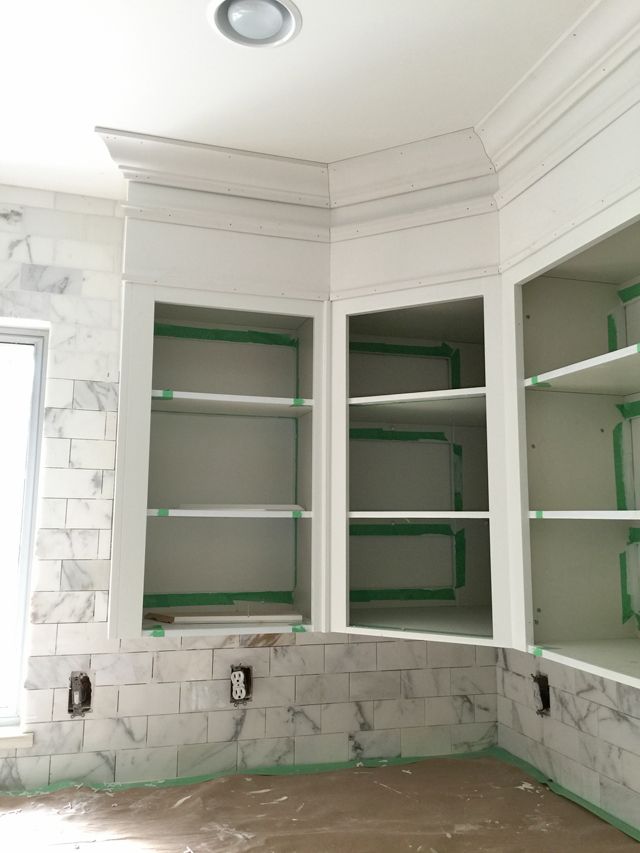
And now for the dramatic side-by-side, we wanted this boxed-in drywall header to appear as a natural extension of the cupboards to the ceiling, so with the help of Metrie and their incredible trim and mouldings, we created a polished and modern look using a crown, panel mould, and screen mould build-up:
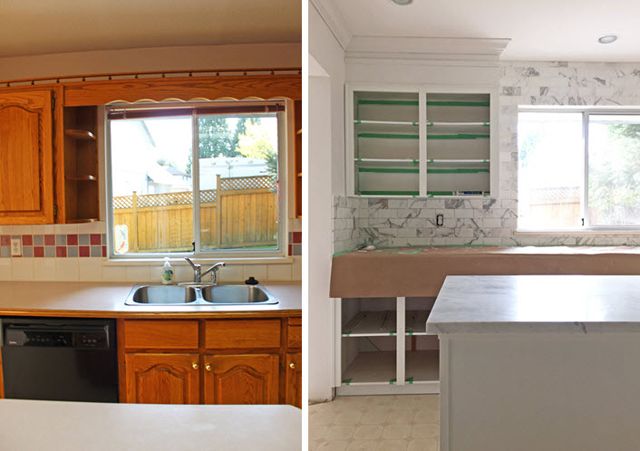
The trim finishings will also be wrapped around the cabinet on the far left to meet flush with the new Calacatta backsplash. We painted everything out in BM Chantilly Lace, and ordered new oak shaker-style door fronts (and at a whopping $1200, this budget-friendly alternative was a steal!).
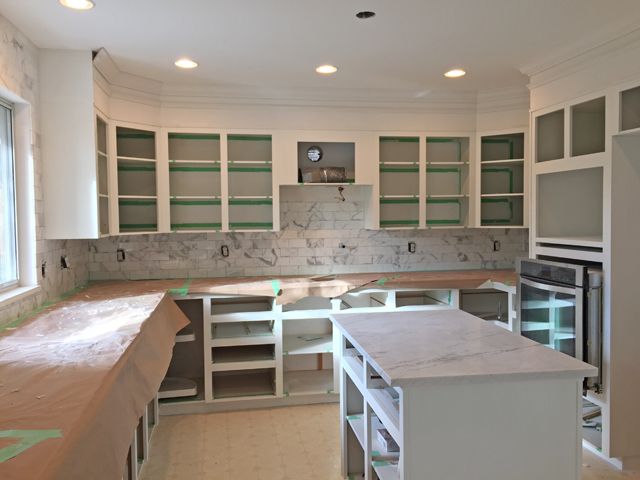
Another close up of those gorgeous Metrie pieces, we utilized 4 1/4" crown, combined with French Curves Collection panel mould.
Bright pot lights in place, and a lovely marble island counter that I'm sure we will stain like crazy, but I'm so excited to have!
This spot is going to have the wooden stove hood returned once painted, and a stunning jewelry-like Brizo Traditional pot filler on the wall! I can't even believe I'm going to have my very own pot-filler, is it weird to say that that's the stuff kitchen dreams are made of? It'll be paired with the new SmartTouch Technology faucet that I so cannot wait to test out, no more dirty hands touching the faucet lever!
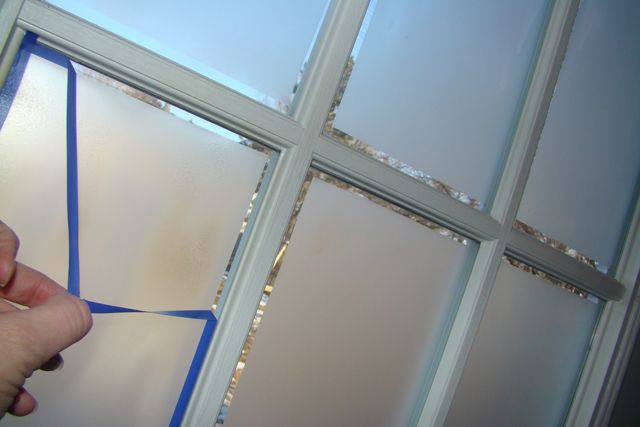
I've also got French doors going in within the eating area, more on that to come soon! I plan on a little DIY using a frosted self-adhesive product from d-c-fix that can be removed and reapplied multiple times without leaving any sticky stuff behind.
The yucky pantry door before & after - we chose a Masonite wood 5 panel shaker door to keep things looking clean and modern:
Some of the items going into our kitchen space are linked below, more to come soon! Thank you for following along with our adventures in renovating ;)
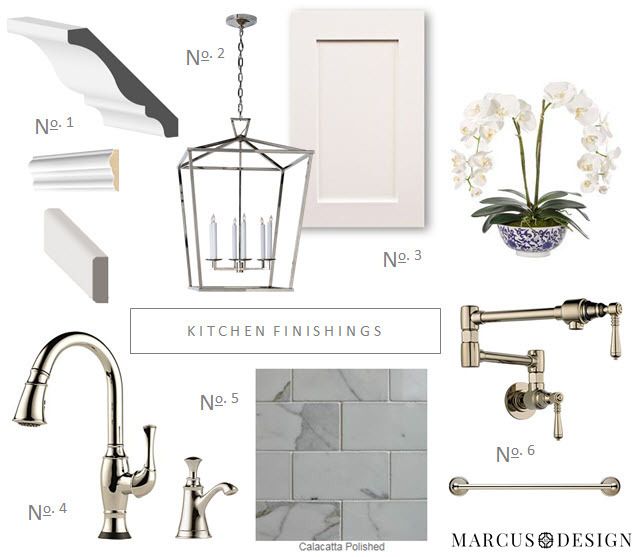
No. 1 - Metrie 4 1/4" crown combined with French Curves Collection panel mould trim and pine screen mould | No. 2 - Circa Lighting Darlana Lantern | No. 3 - Shaker cabinet fronts | No. 4 - Brizo Talo SmartTouch Technology faucet & soap dispenser | No. 5 - 3x6 Calacatta polished tile | No. 6 - Brizo Traditional pot filler and Traditional 18" towel bar


10 comments:
Oh my goodness. You are doing such an amazing job. The kitchen is stunning already!!! I love the moulding. I love the counter. Ilove the backsplash. Chantilly Lace is one of my favourite colours as well!! Get out of my brain! ;-)
Can't wait to see the next set of pics!
Looks so great! Thank you for sharing your tips!
You and your family are doing a marvelous job. Your kitchen will be stunning.
It's looking really good, Nancy. Can't wait to see it finished!
Amazing already! So smart to extend the cabinets, makes a huge difference!
Catching up on my favorite blogs over the Holiday break and OMGoodness, Nancy, I love what you're doing in your kitchen!!! xx, Sarah
Love, Love, Love everything you do!!!! My daughter is looking to redo her kitchen as well....on a budget:) Could you pls let me know where you were able to purchase new door fronts for the cabinets. Please!
Tami
This is an amazing transformation! I love the finishes you are choosing. What was the exact or rough measurement of the space above your cabinets? Such a smart idea.
I love what you've done! I have the same question as Kelsi - interested in the space between counter top and bottom of cabinet as well as the measurement from top of cabinet to ceiling. I realize this post is more than a year old. I hope you see this! Thank you, Jen
I know it’s an old post but I didn’t see anything about where the shaker doors came from. I love what you did and am currently redoing my 1960s beauty :-)
Post a Comment