


Here we go everyone! A post LOADED with before & progress shots for you today (finally!). It's been mayhem between growing a baby, working full-time, and climbing this mountain they call "renovation." Just for future reference, these things should never be combined - scary stuff my friends, scary stuff.
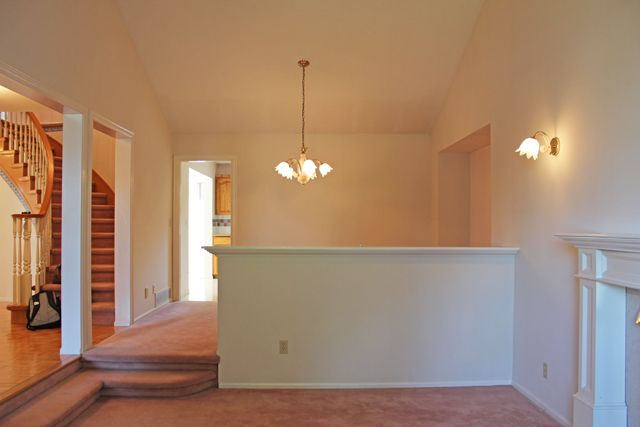
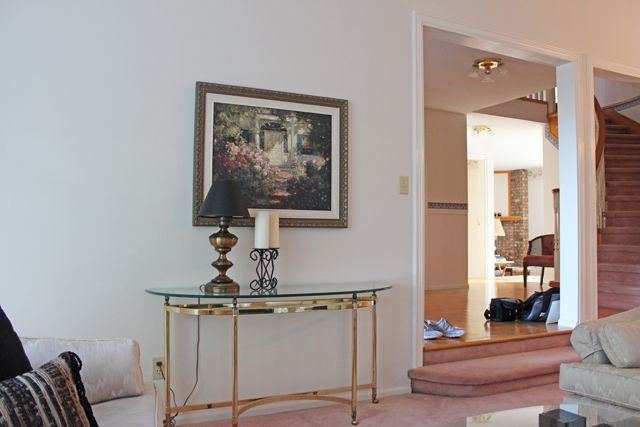
All jokes aside, we are finally feeling like we are getting somewhere :) I want to start with the beginning of the story for the living/dining space - a large scale room that you see immediately to your right when entering the front door of the home. Here are the legit 1989 befores (the real estate photos we viewed when purchasing the home back in May):
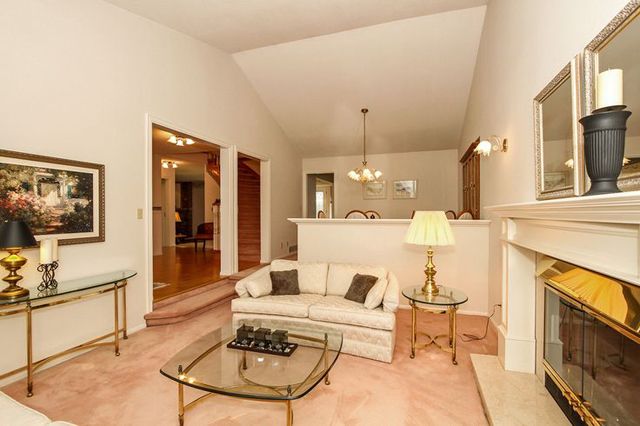
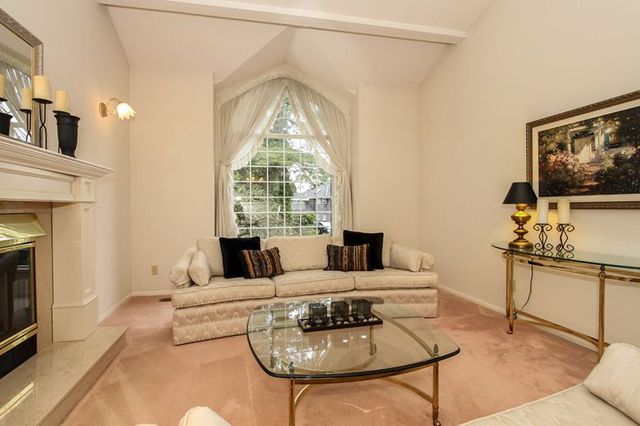
Ok - so now you get the feel for the awkward step down, the pony wall separating the two spaces, the big bare-ness of the vaulted ceilings with zip-zero soul or personality. I think that was the point that bothered us the most, this was a large space, with loads of potential but it appeared so bare and boring with literally NO architecture. This quickly became our main plan and priority for the room! In our last home, we saw that the efforts we put into panelling a few feature walls was a huge appeal, and a major selling feature that we strongly believe got us the most bang for our buck, an investment that was so worth it.
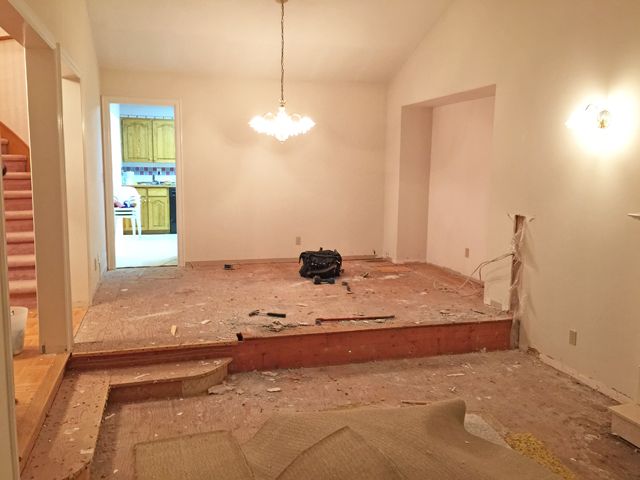
First thing to get knocked out was that darn pony wall:
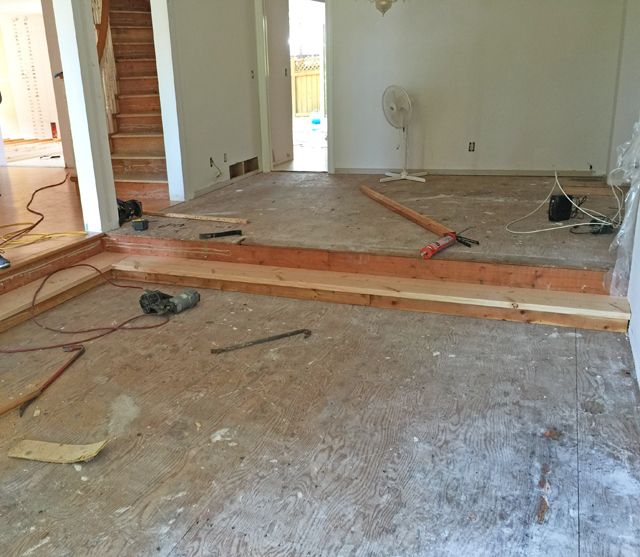
We rebuilt the step going all the way across the room instead (imagine these all covered in gorgeous oak wood flooring!!):
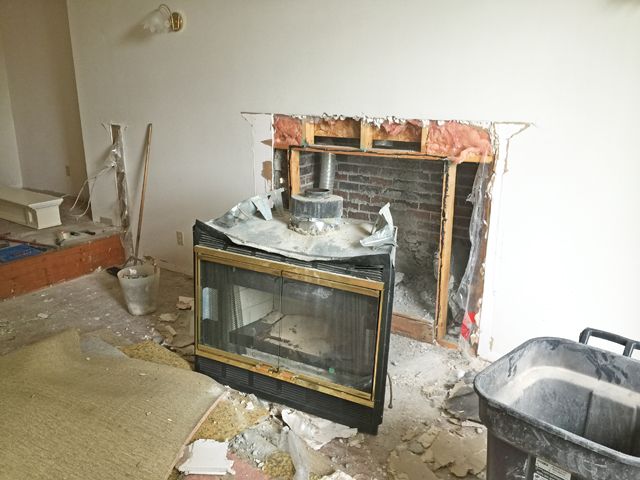
Carpets were of course ripped up, and the gas fireplace insert was removed. Lucky we pulled it out as we discovered a water leak in desperate need of repair. That's the not so pretty part of renovating, and it's been bumps in the road like these that have really added to our overall timing.
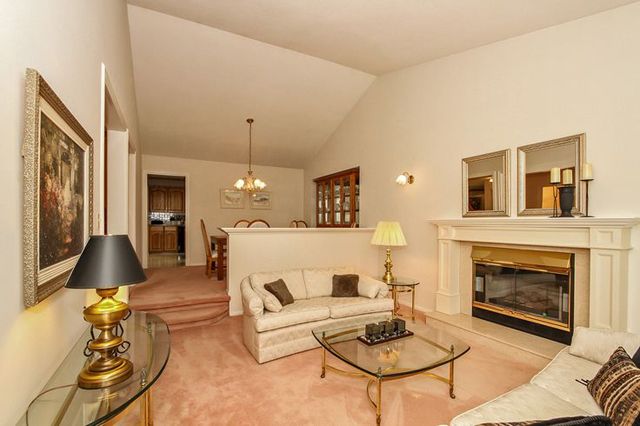
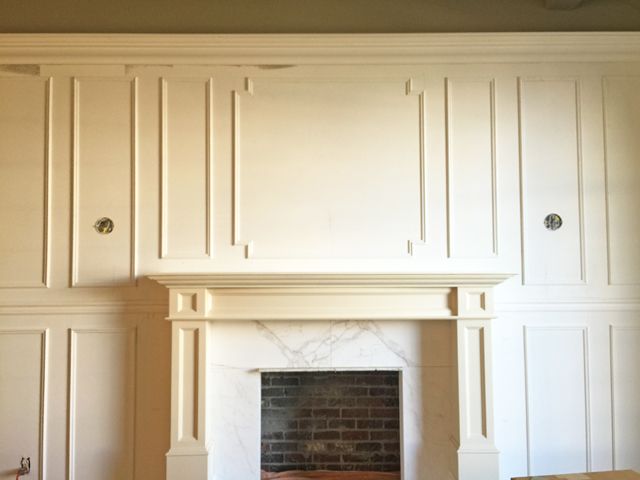
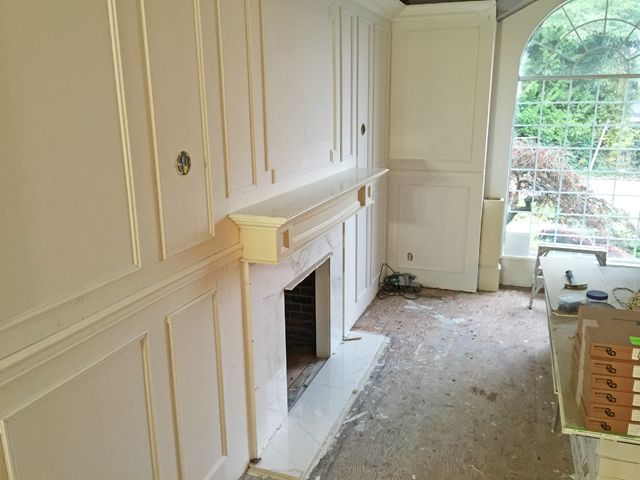
We chose to conserve the old mantel as it is in good condition, and with a new brighter white coat of paint I think it's going to work well with our vision:

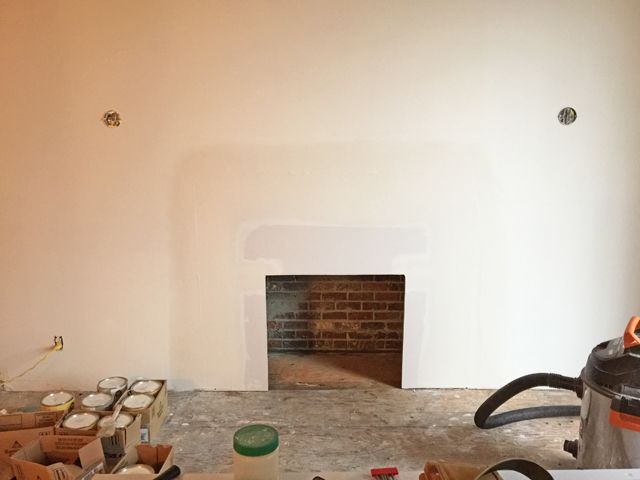
Notice how far apart the sconces were on either side of the mantel? It was too widespread for my liking so I had our electrician bring them in closer on either side before we closed everything up with drywall again:
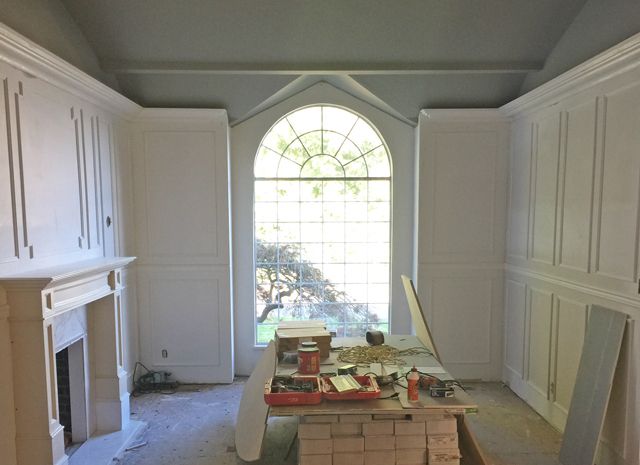
Then I started my hunt for inspiration. There are so many things you can do with a vaulted ceiling, I wanted to try something a bit different, not just faux wood beams, or bead board as you've likely seen in many spaces. Paint out the ceiling, create a tray ceiling that breaks up the wall with crown, and go heavy on the trim and moulding on the lower portion of the wall - these were just the interior finishings we needed!
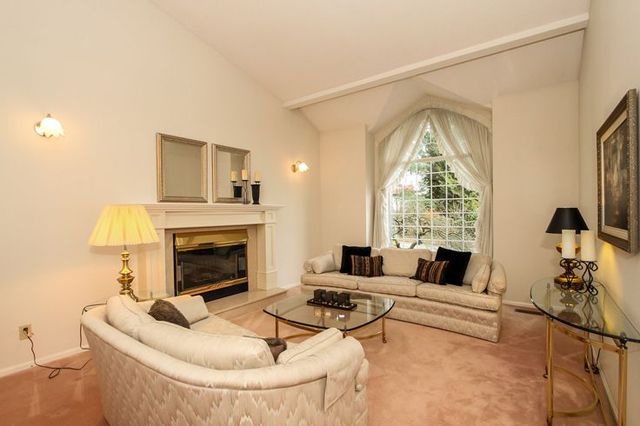
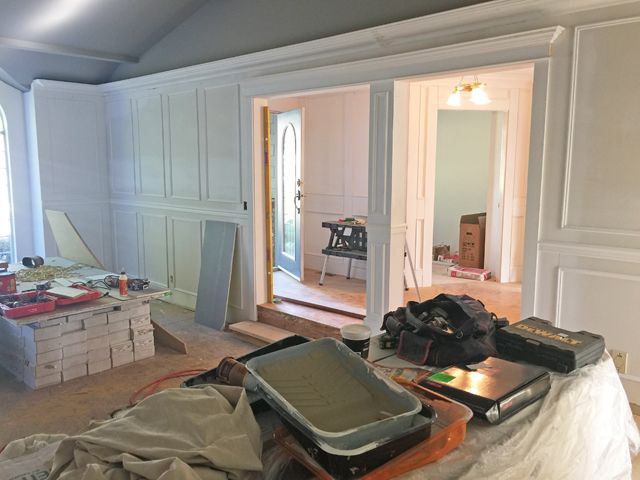
So we had the core of our plan, and we set out to execute it using the French Curves Collection from Metrie. Scene I of this collection suited exactly what I was looking for, young-traditional style with a perfect mix of ornate and contemporary elements. We chose a large-scale crown to encircle the entire room and began to panel the lower half with panel moulding. So for dramatic effect, remember it without any trim:
And now that same corner, voila!
We are head over heels in love with the transformation, and it hasn't even been filled or painted out white yet!!
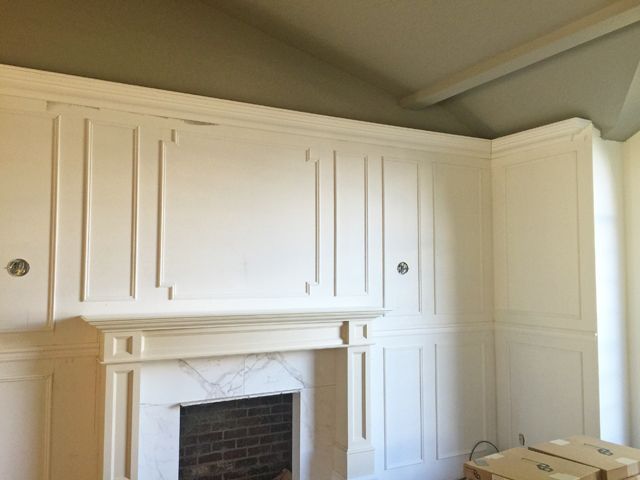
We added a little bit of framing detail above the fireplace similar to what you see in the photo below, I think that is the fun of planning and creating with trim and moulding, you can really let yourself get creative!
And even with an all-grey ceiling, the white will keep the room fresh and lively (I've selected BM Chantilly Lace which will be going up soon!).

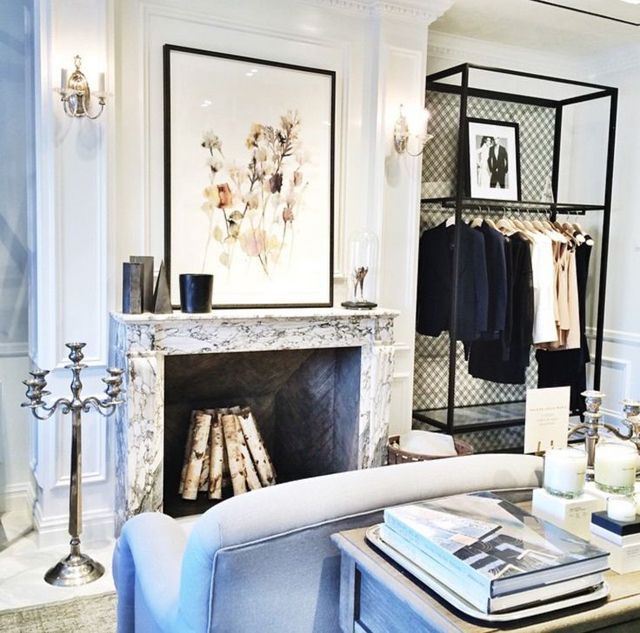
We are actually planning on leaving the fireplace non-functional but pretty for now, so in the coming weeks I'm going to be styling it up with sconces and birch logs much like this one from Club Monaco in NYC:
Can you picture it all? Here's a bit of a mood-board of my continued plans for this space so you can get a feel for where I am headed with it, much much more to come soon! And stay tuned for an update on kitchen progress in the coming week.
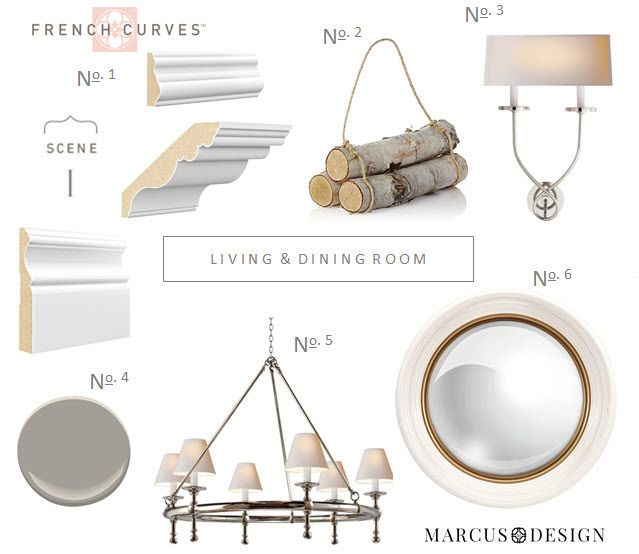
No. 1 - Metrie French Curves Collection Scene I, 7 1/4" Crown, Panel Mould, and 5 1/2" Baseboard | No. 2 - Crate & Barrel birch logs | No. 3 - Circa Lighting Symmetric Twist sconce | No. 4 - Benjamin Moore's Escarpment | No. 5 - Circa Lighting Classic Ring Chandelier | No. 6 - Lamps Plus Convex mirror


16 comments:
Looking good so far, Nancy! Adding panelling and moulding makes a huge, positive impact to the space, I love the way you planned the placement of yours. I see we share a couple of favourite designers – Colleen McGill and Elizabeth Metcalfe! (No relation, though.)
Can't wait to see more progress updates and the completed space!!
Oh it looks so good!!! All the moulding makes such a dramatic difference - can't wait to see the final space! xo
OMG Nancy - what a huge transformation already!! It has a completely different feel. So stately and sophisticated. I love that you've carried the moulding out into the entry way as well. Looking forward to seeing more!
This transformation looks stunning so far. I can't wait to see how it comes out. I do love all the inspiration as well.
Loving classic lines and symmetry, vaulted ceilings with odd angles have always stumped me. Painted out ceilings and the classic moulding is brilliant. Just wonderful!
Looks terrific, Nancy! It's already so good and will only get better as you finish things up. Yay!
WOW!!!! What a difference! the mouldings really make the room sing! Stunning...now I really want a visit!
AMAZING!!! I just found your site and I'm in love with your style.
FAB WORK!
That moulding is gorgeous! I'd love more of it in my home . . . someday. So beautiful.
Omg this is the best transformation ever! Now with even better bones in the room you don't have to over decorate to make up for builders grade finishes. Now that you have amped up the architectural details let it speak for itself! It is so beautiful Nancy!! Congrats- and on the baby to be also! Good to catch up with you ! Xo Nancy
Looks awesome and so much going on! It looks totally different, don't you wish the previous homeowner could see all of this?
It's hard to believe that this is the same room, adding all the detail on the walls and replacing the fireplace, WOW. The room is going to be beautiful!!
Well Done,
Jenn
This is already looking gorgeous! can't wait to see it finished! Nice work with all the details!
Wow, it's looking great. Totally see where you're going with this and it's going to be fab! We used trim from the Fashion Forward collection in our living room. It's good stuff!
Wow! This is insanely good. Crazy transformation. I love it!
Absolutely brilliant design work - I love it all!!
Post a Comment