Showing posts with label My home. Show all posts

Wednesday, February 23, 2011

{diy draper faq's + bedroom before & after}

First a HUGE thank you for all of your kind words and encouragement on my IKEA Rast project, I am overwhelmed by your response! And a big welcome to all my latest followers, I am so thrilled to have you here.

Today I thought it would be fun to include a little before & after of our bedroom, mostly because before & afters are just so darn satisfying aren't they?? We were lucky enough to be able to take pictures of all of the rooms before we owned the house {the day we had our home inspection done} so the before pics are that much more disastrous :)

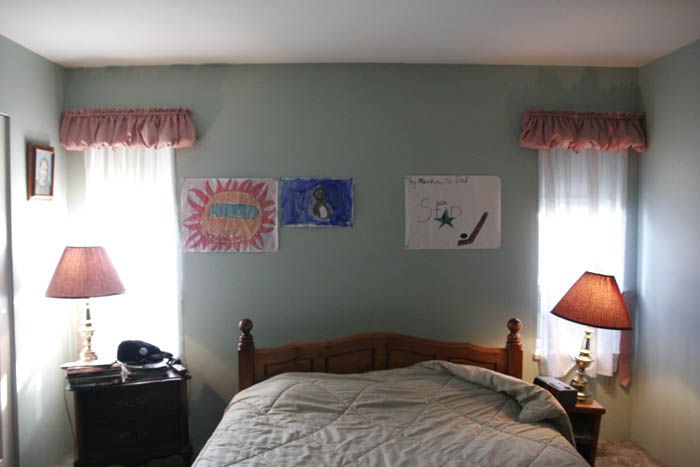
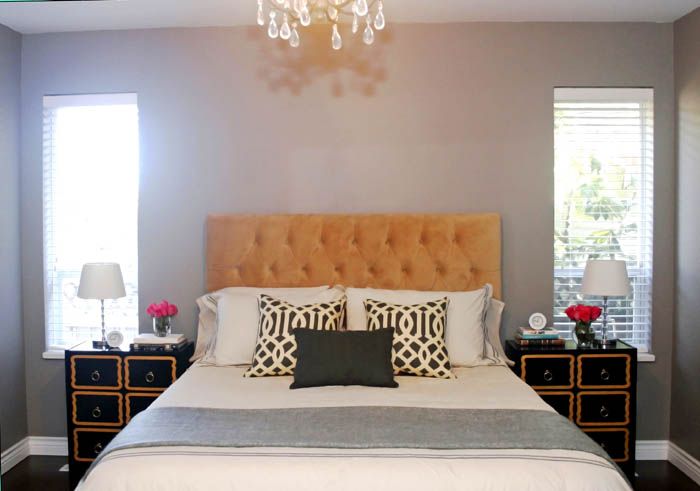

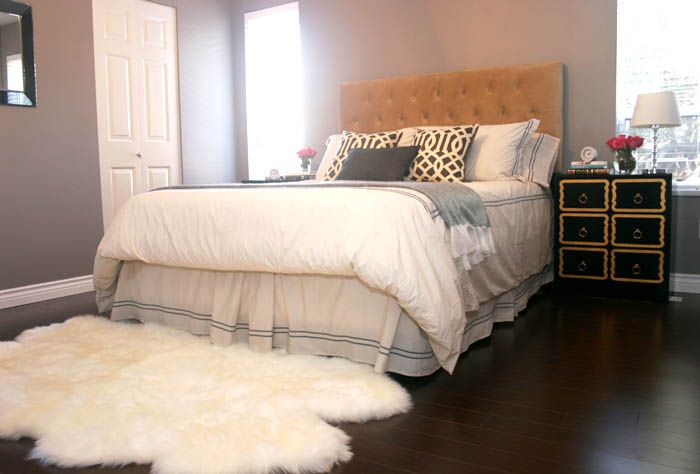
What a difference simply cleaning and painting can make! We got rid of the fuzzy blue carpet, added baseboards, wood blinds, and a chandelier. Can you believe there was NO light fixture in this room? Only lamps controlled by the light switch. Oh the 80's.

And as a follow up to the frequently asked questions you had posted on the DIY project, here's some additional info:

Rast Dresser Primer: I forgot to mention that I used Behr's Premium roll-on primer in white to coat the dressers. I'm sure black would have been better but I couldn't find and oil based black primer! Oil was recommended to me as I planned to use a black lacquer spray and this would help to hide the grain on these untreated pieces and give a smooth finish. I did 2 coats and sanded with a furniture grade {220} sandpaper in between each coat.

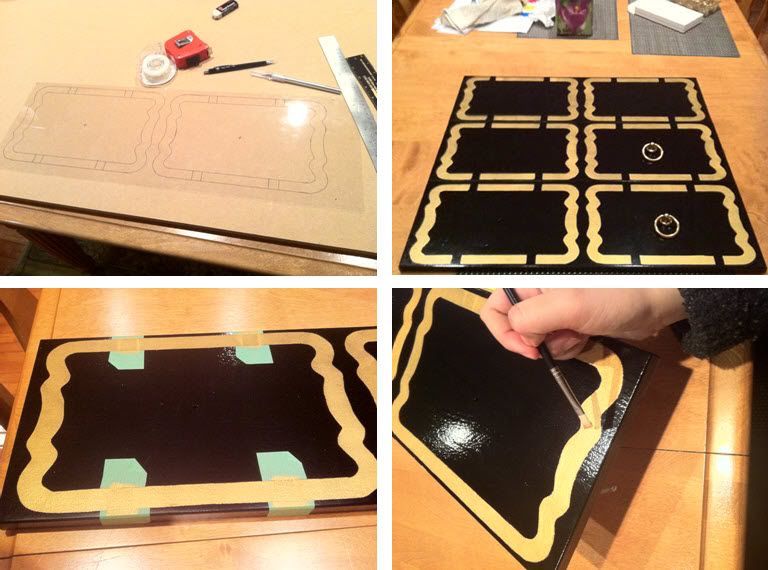
Stencil: I thought images may help with the questions you had about my stencil:
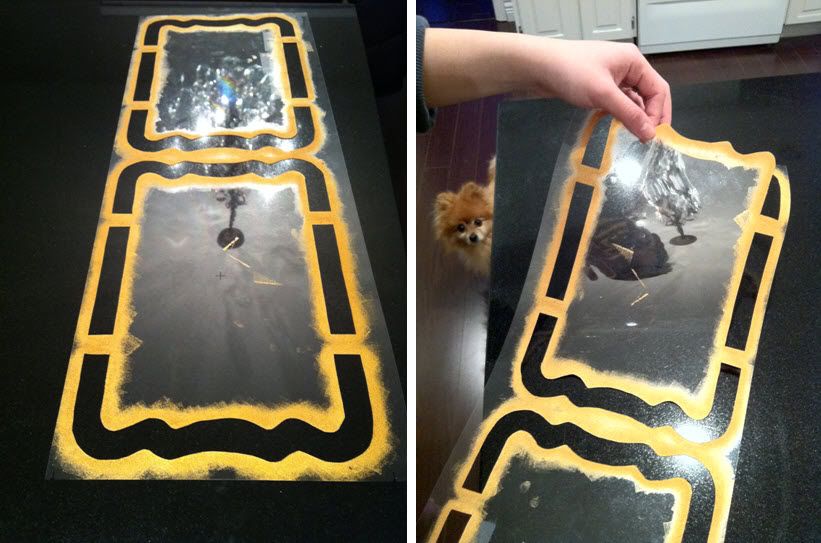

{There's my curious little fur baby ... always seems to make it in the background of pictures ... he's like the Where's Waldo in all our family photos!}


You can see we kept four gaps in the inlay so that the centre of the stencil would stay attached to the outside. If you didn't leave attachments the middle would fall out. More importantly, this means the centre will always be in the exact same spot!

Headboard: This was a very affordable find through Costco online! Believe it or not this piece came in at $339.99 including shipping.

Paint: The walls were painted Benjamin Moore's Escarpment, one of my favorite warm shades of grey.

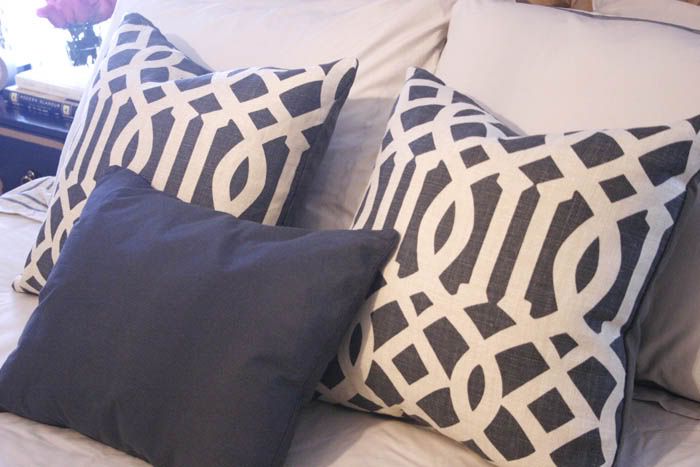
Pillows: The lovely pattern fabric is KWID's Imperial Trellis, and a shout out goes to my fabulous friend Laura for sewing them for me :)

A big thanks to Jenny at Little Green Notebook for posting this project and Kate at Centsational Girl for linking to it on FB :) Also, I'd LOVE to do a post and have anyone that tries this at home submit your own version! Please let me know if you do give it a try, I can only imagine all the variations on this project that could result!


Sunday, February 20, 2011

{my ikea diy: dorothy draper style!}

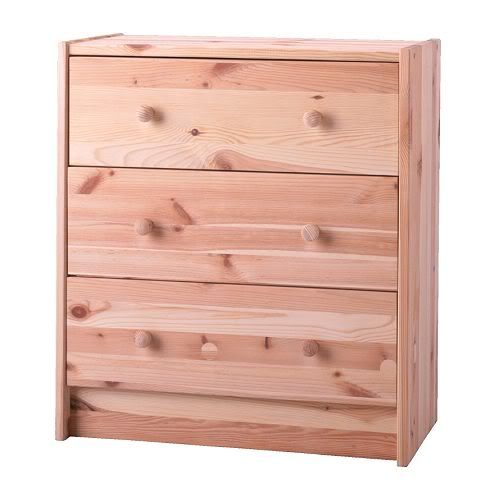
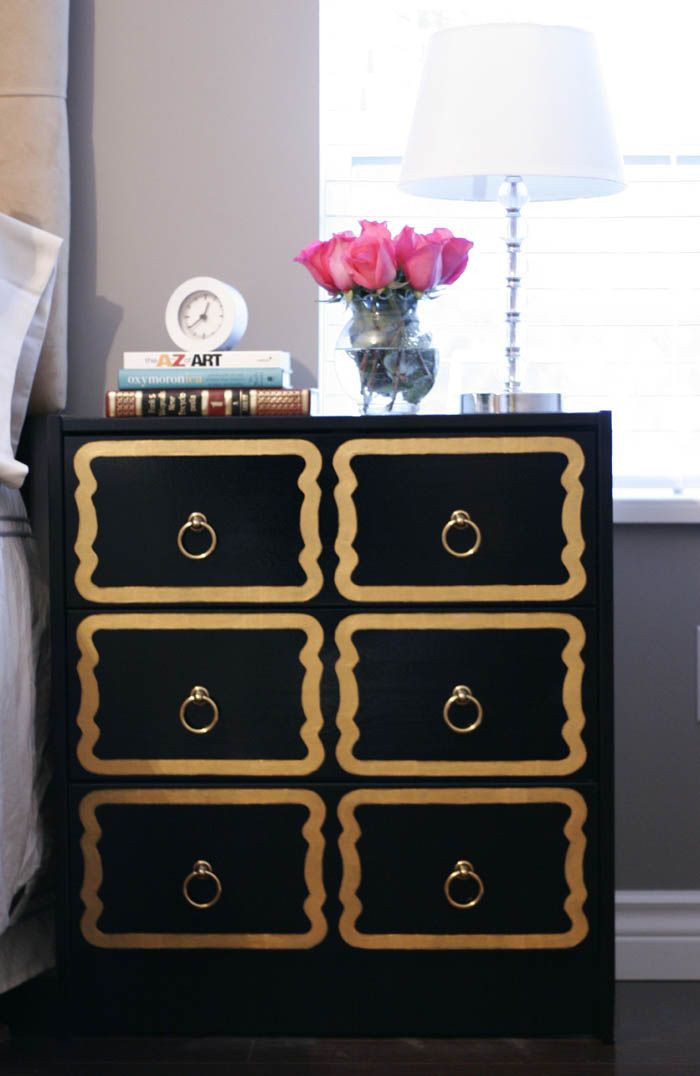
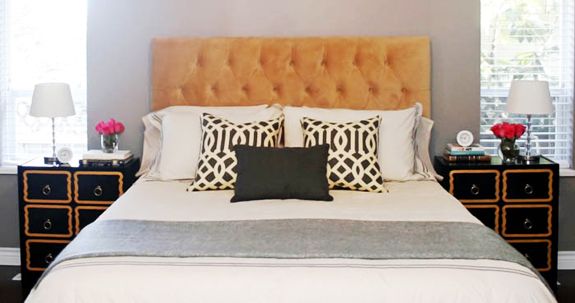
If you are following my blog you may have noticed that I am not the biggest 'DIYer' - I wish I was but I am often the type to start a project and not 'quite' finish it, or I have too many ideas in my head that so few of them actually come to fruition. Well this time around I finally put the pedal to the metal and finished a project that I am quite excited to share with you! Here's how I took this plain jane IKEA Rast dresser from drab to fab, in true Dorothy Draper form!

So I started out with a couple of these ....
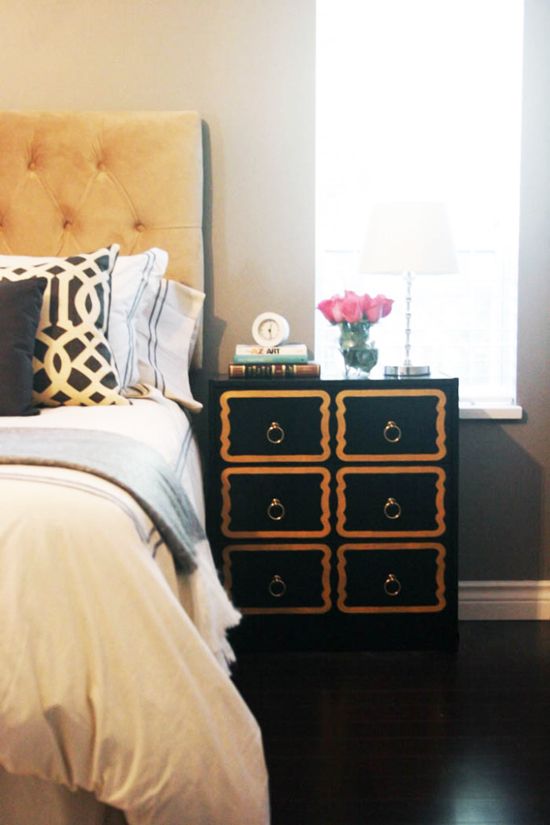
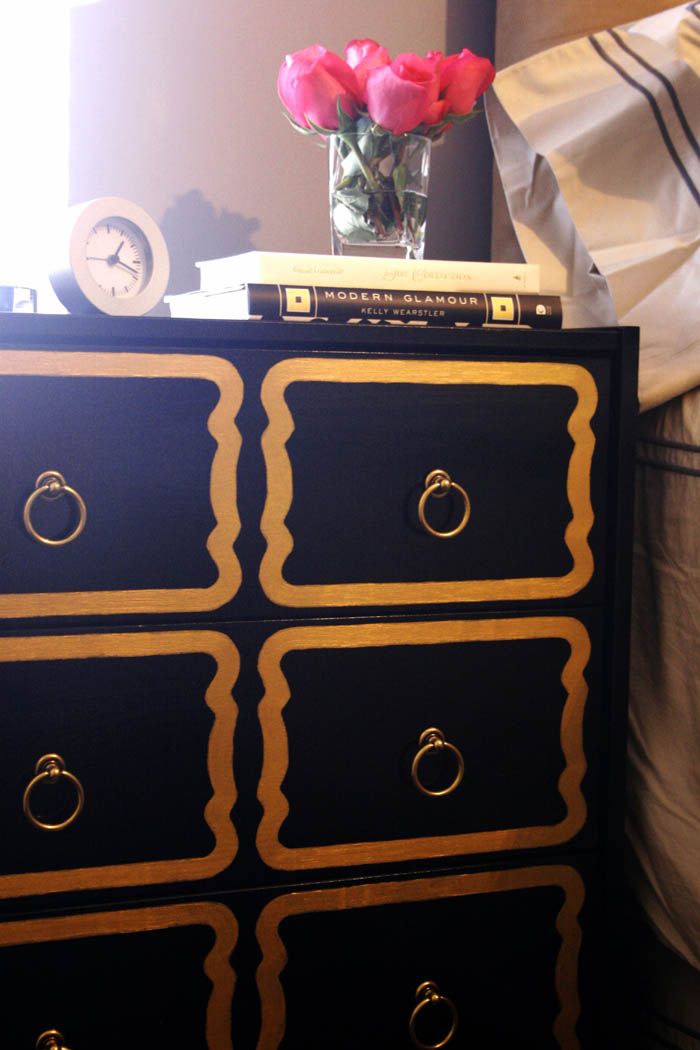
And turned them into this!


How I got the Dorothy Draper inspired look:

1) I bought 2 Rast dressers from IKEA, and assembled the tables, except for the drawers.

2) I primed the 'body' of the dresser {assembled} and the fronts of the doors and then sprayed them using RustOleum's black lacquer spray {Tip, I would buy the attachment for spray paint cans to make spraying evenly much easier...oh, and wear a mask and spray in a well-ventilated area!}. I did 2 coats to get good coverage.
 
3) I took inspiration pics from Dorothy Draper chests online, and blew them up to be able to draw the shape of the inlay on a piece of transparent paper that I cut to be the same size as each drawer. Here is where the measure-twice-cut-once rule really applies! To be truthful, this is where my Dad's engineering skills came in handy, thanks Dad!  We cut the stencil using an art Xacto knife, leaving gaps so that the centre of the stencil stayed attached to the outside. We secured the stencil onto the drawer using painter's tape.

4) Using Liquidtex's Iridescent Rich Gold heavy body acrylic paint, we carefully painted on the design. I removed the stencil after allowing the paint to dry for about 1 hour. I taped off the gaps that remained (due to the stencil) and filled those in. I let this dry over night and then went over the gold free-hand to make it even thicker afterwards.


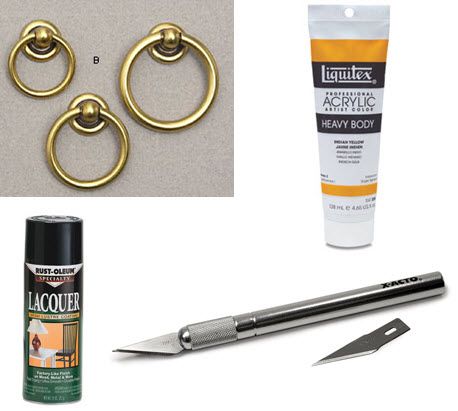
5)  I then put the drawers together on the built shelf, and put in some beautiful bronze ring pulls from Lee Valley Tools. Confession: I still have to coat these babies in a glossy varathane to protect them (on the to-do list!).

Source guide:

Ring pulls: Lee Valley (size: 51mm x 43mm- $2.40 x 12)
Side Tables: Ikea Rast Table ($29.99 each)
Black Paint: RustOleum's Black Lacquer spray ($5.99 per can x 4)
Transparent Stencil paper: Opus Arts ($1.80)
Gold Paint: Liquidtex Iridescent Rich Gold - Opus Arts ($6.60)
Xacto knife: Opus Arts ($3.49)


So the total cost for 2 fabulous, Dorothy Draper Espana Bunching-inspired bedside tables ... drum-roll please!!


Just under 125 dollars! Not bad right? Especially since I know I'm not able to afford a real-deal DD piece anytime soon ... some of these well restored fabulous dressers can run you up to $4000 each! And yes, I know that some people have found them in antique stores for  around 20 dollars in the States, but I can't even imagine finding anything like that here in Vancouver! For now, I'll be happy to enjoy my little DD-wannabe dressers :)

Be sure to check out some of the FAQ's about this project + a fun before & after of our master bedroom here!


Thursday, December 9, 2010

{a sneak peek at my kitchen reno}

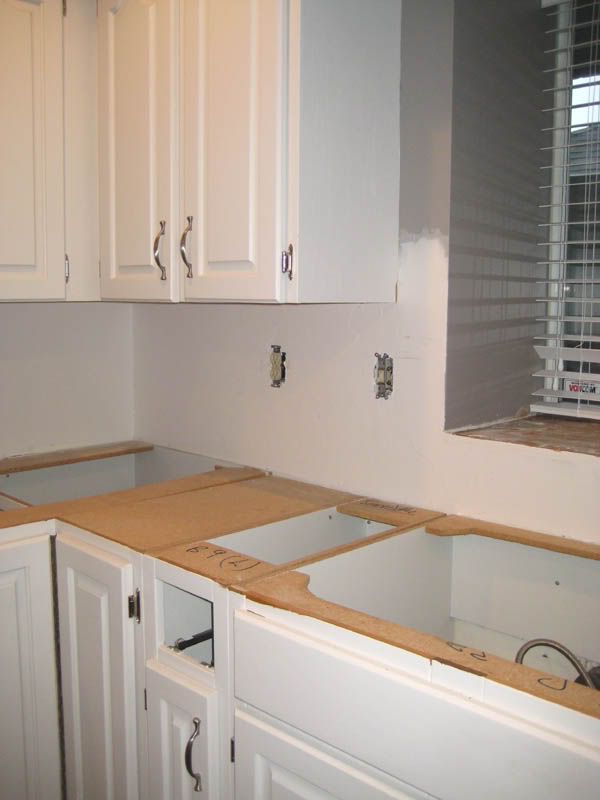
I am so excited this morning that I just had to share a tiny peek with you! I am finally getting new kitchen counter tops TODAY! We have been wanting new counters ever since we moved in this home over 3 years ago, and they'll be installed this morning :) We {aka hubby} had already painted the oak cabinets white before we moved in, and now along with our counters we will be putting up a new backsplash! So I have been 'counter-less', and even more devastatingly 'sink-less' for a week now... needless to say the Christmas baking has been brought to a screeching hault!

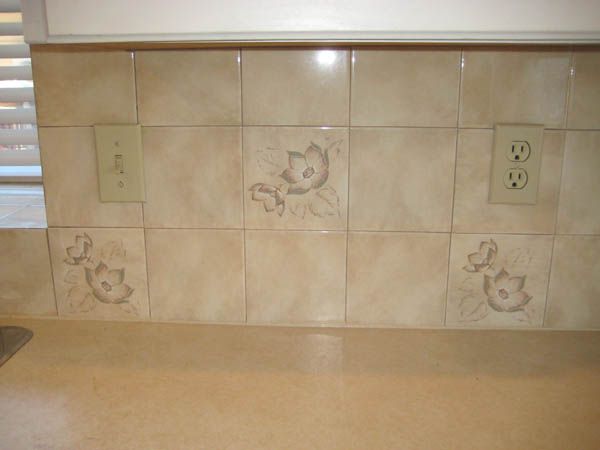
Here's a tiny view of what the former 1986 beige formica counter and backsplash looked like, I'll have a FULL before & after post coming up when everything is done, so stay tuned! Let's just say this kitchen has come a far way from the mid-80's! {Seriously, can you imagine that some one, at one time, picked out this flower backsplash for their kitchen? Wow.}


Can't wait to share my choices and the final results with you. Hope your week has treated you well, it's almost Friday!!

Tuesday, November 23, 2010

{my entryway dressed for the holidays}

I've finished dolling up my foyer for Christmas and I've been enjoying coming home to all the glittery festive-ness every day! This space got a simple and pretty palette:


I repeated the feathery look of the bird ornaments {from Liberty} by adding a few black feathers to my pint-size white tree. The tree was a steal of a deal {on ebay} and I glammed it up by placing it in a glossy black vase {from Homesense}:


I love the idea of adding sparkle in unexpected places; I hung strands of crystals from the sconce by the front door, a subtle but pretty touch!


Have you begun dressing your home for the holidays? I'm guessing now that Thanksgiving is done, there will be some serious decking of the halls :) Well it's pretty chilly here in Vancouver, so needless to say it's beginning to look a lot like Christmas! If you are visiting from the blog parties over at Southern Hospitality and Hooked on Houses, welcome and thank you for popping by!! Be sure to pop by the party at Southern Hospitality and at Hooked on Houses and check out other beautiful vignette's from so many talented bloggers :)

Sunday, July 4, 2010

{a dash of color: my living room}

I’m so monochromatic! I always find myself using neutrals, grey, and white in my own spaces even though I am drawn to lovely punches of color in other people’s rooms! So I thought is was high-time I get myself out of my 'boring-in-beige' box and throw a dash of color into my living room, the space I inhabit most often. You might have taken a peek at this room when I posted about making over my living room with paint, so here is the space now, with a lovely shade of turquoise added in:


It all started with this cute little artichoke-inspired vase, what a perfect shade of turquoise! And at only $12 {from HomeSense}, I had to buy a pair!


Then came my sweet little side chair, isn’t she pretty?


The turquoise floral pattern on this chair changes during the day depending on the lighting, look how punchy it is in the evening:


Mix in some Moorish tile pillows, and 2 side lamps with turquoise shades, and I’ve added color to my room without breaking the bank! Just a few accents and the whole space reads in a totally different way.


And I chose lamps with a white base rather than lamps with a turquoise base so that when I inevitably change up my color scheme, I’ll just pop off the shades, and voila! A new life! I’m thinking they would also look great with a black shade and white piping…uh oh, that’s my monochromatic-self trying to come through again … ha, ha. But seriously, I am thrilled to finally be surrounded by this lovely dash of color!


Don’t forget to enter your name in to win a $50 Gift Certificate to CSN Stores by clicking here!

Sunday, May 30, 2010

{my dining table}

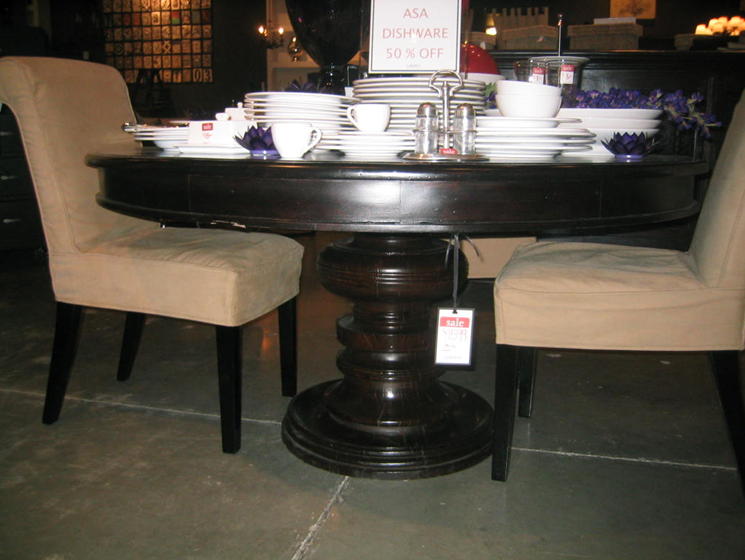
I am so exciting about a recent addition to my dining room dĂ©cor! Almost 3 years after moving in, I finally have a dining room table and I love it! I was on the hunt for a small sized round table (as my dining room is not that large), in a dark wood, and with a nice meaty base, here’s an example of a table I had been eyeing from Liberty:


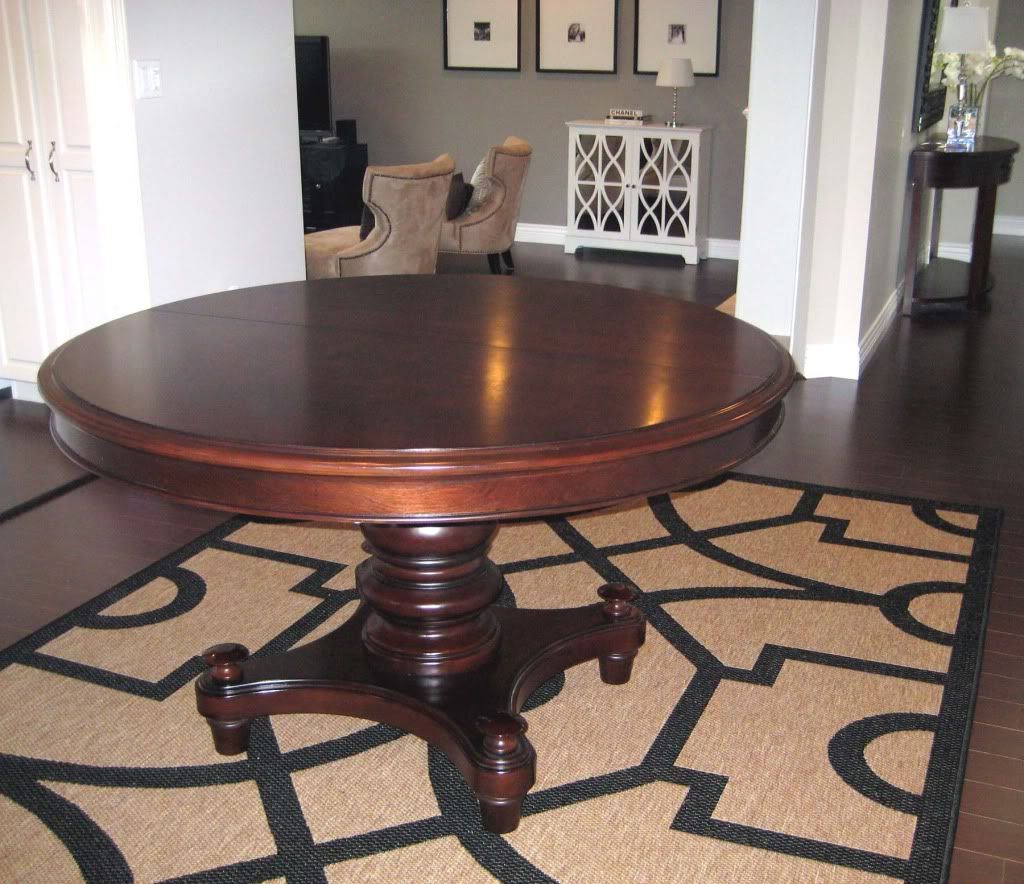
This table was a bit out of my price range so I had to be patient! A couple of years later, this amazing table with similar styling popped up for literally less than 1/3 the price of the one that I had been coveting! Such a great deal…so I say it pays to be patient!! This table is from Sears, and it comes with a leaf to make it a larger oval shape when needed (bonus!):


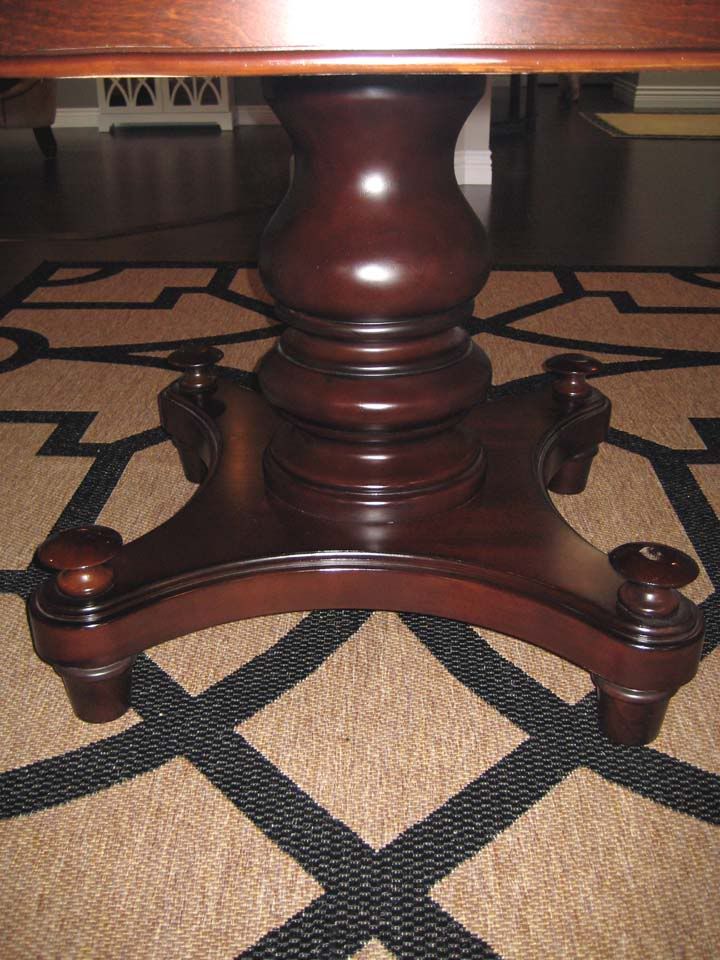
And just look at the pretty base!


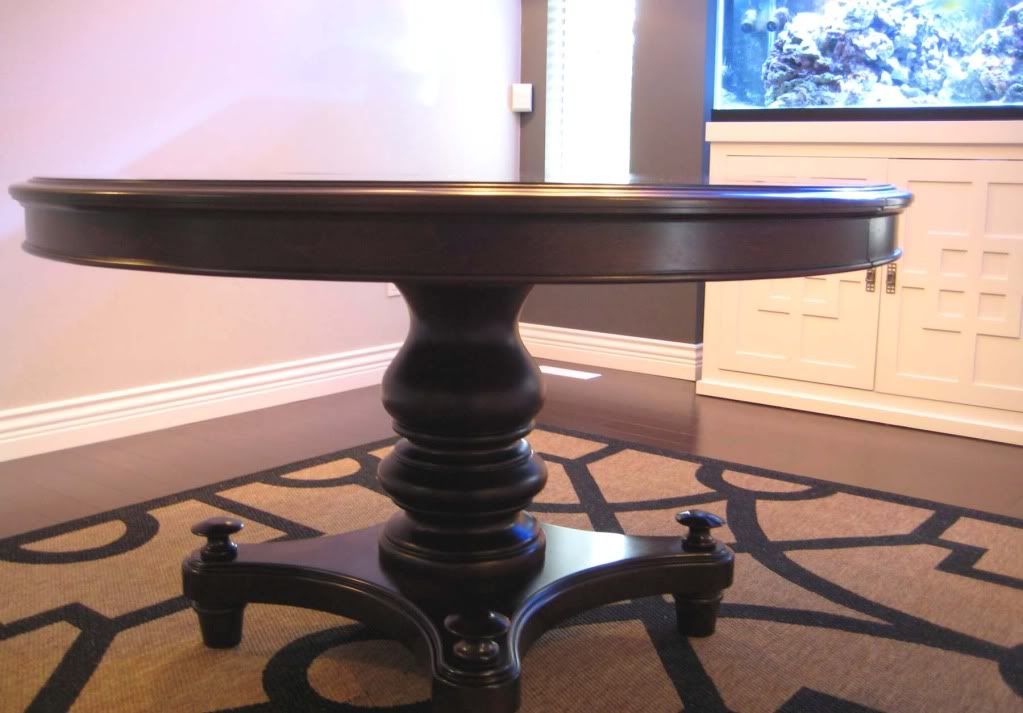
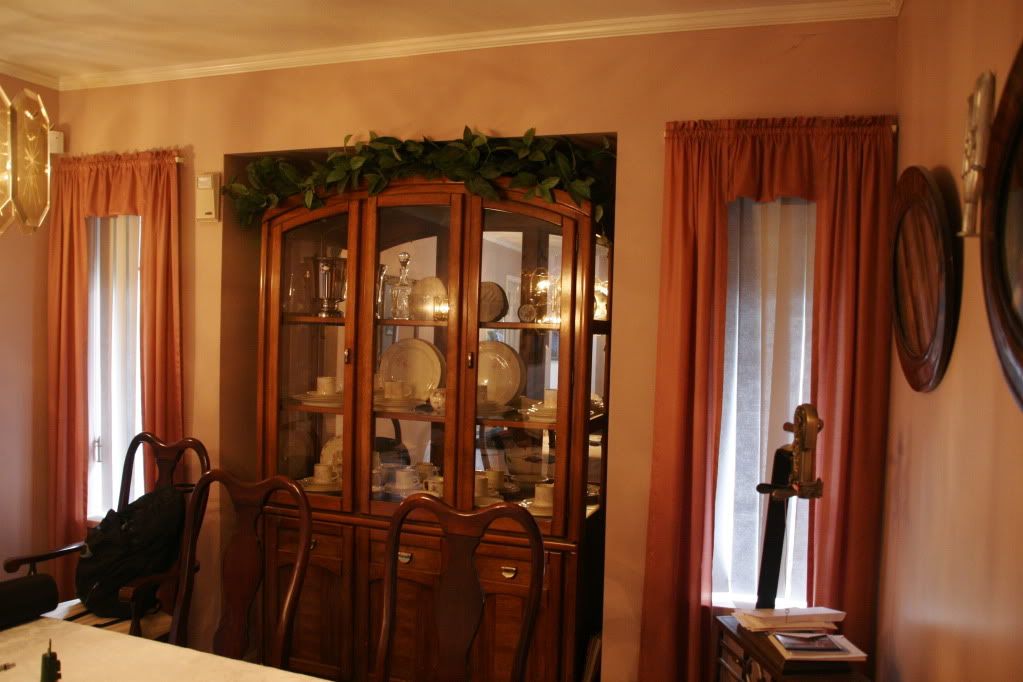
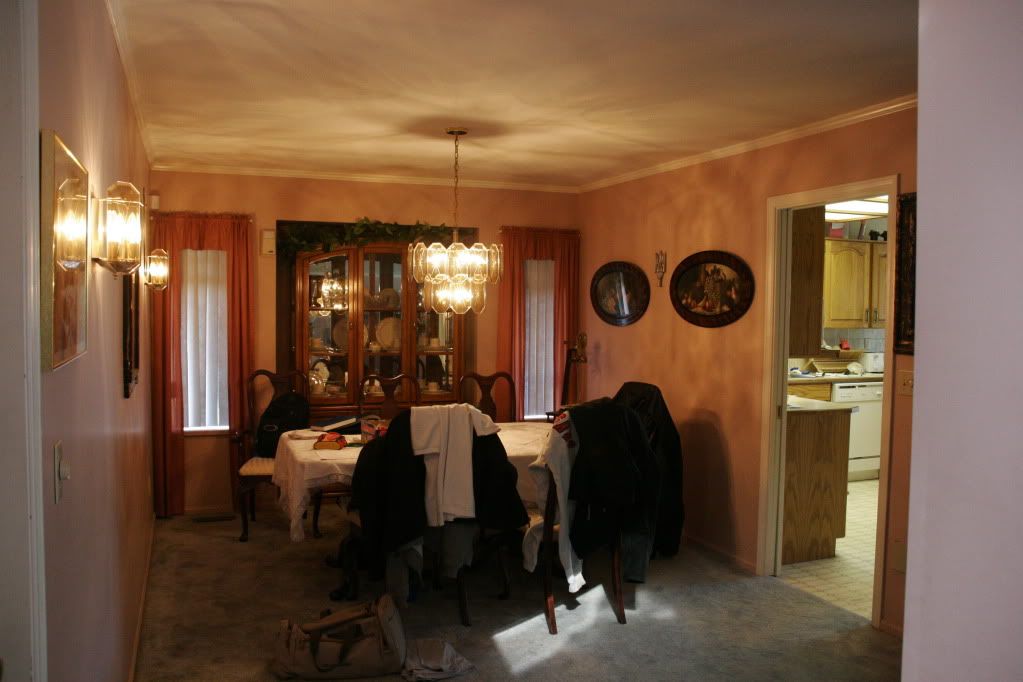
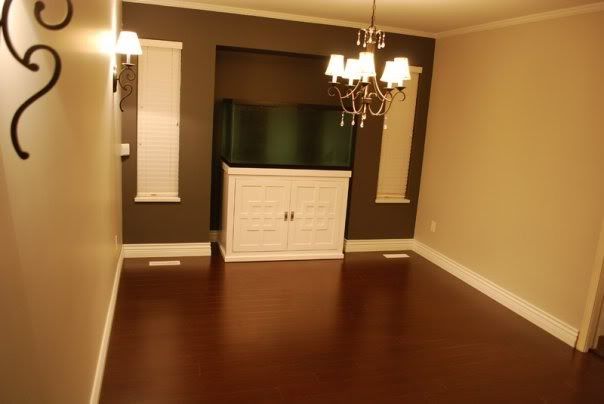
There in the background is our DIY aquarium that I posted about here, and just for fun, (and because everyone loves a good before and after!) here are a couple of before photos of the dining room before we purchased our home:


And now, aaahhh....much better:


We changed the flooring, painted, changed up the light fixtures, added baseboards and of course got rid of those crazy window treatments!


Here’s my little fur baby trying to get in on the picture taking action:


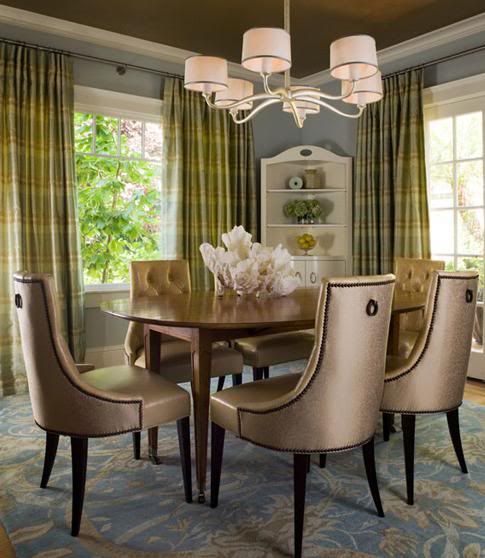
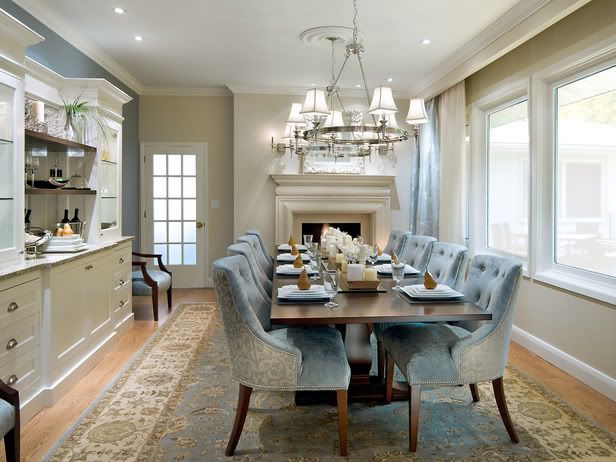
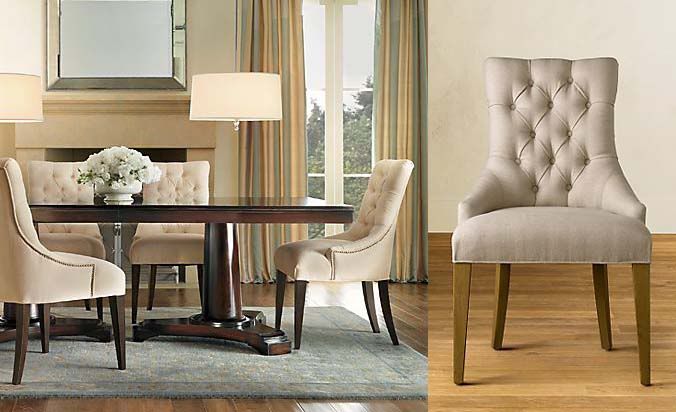
You can see we still have tons to do in here. I have so many plans in my head, but one slow step at a time. I can’t wait to reveal a fully finished dining room to you! Now I need dining chairs, and again I am on the hunt for a specific style, and trying really hard to be patient. Here are some dining rooms with the shape I am lovin’ right now:


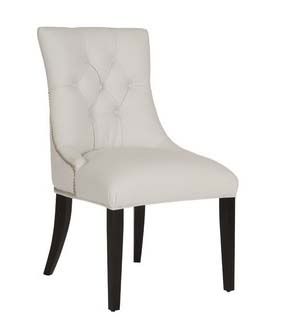
The chair I am coveting most:


So yummy right?? The exact chair pictured above is the one I am lusting over, and it is not quite in my budget ($800 and up each, Liberty). There are several comparables, but I am waiting for a better deal to pop up! Here’s what I have found so far:

Restoration Hardware's Martine Chair ($349 and up)


Even Costco is carrying a chair in this lovely shape (and at a very reasonable price, $379 for 2) but if only there were fabric options!!!! Darn! I am dreaming of a velvety charcoal grey.


Has any one come across any similar chairs out there?? Well, for now, I am one step closer to a completed dining room with my yummy new table! Thanks for taking a peek! I'll be linking this post to Metamorphosis Monday's over at Between Naps on the Porch, be sure to head over there for some amazing before and afters!

Saturday, April 24, 2010

{before & after: curb appeal}

Spring is in full swing! This often brings our attention back to our outdoor spaces and gardens. Last year my husband and I did a re-vamp of our front lawn to improve our home’s curb appeal. All the reno’s we have been doing in our home thus far have been carefully selected to get the most bang for our buck when it comes time to sell, and I think a home’s first impression should always be way up on that list! Here’s an idea of how the front landscaping looked when we first bought the home:


The front garden left a lot to be desired… the plants were looking a little bushy, and we were constantly at war with a plethora of weeds! We decided to rip everything out and start from scratch:


The first thing that we had done was some decorative curbing to define the space:


Both my husband and I are not quite gardeners per se, so in order to minimize our on-going battle with weeds, we opted for a heavy-duty liner topped with large-sized river rocks. It’s been working great so far! So here is how it all turned out:


We did a few other things including replacing the worn roof. As well we did a quick and inexpensive upgrade by changing the light fixtures in front of the house, the new ones were from Home Depot. Good-bye 1986, hellooo 2010!


We chose plants with some structure to them, a Pom Pom Juniper (I call her our cheerleader!), a Japanese maple, and a hedge of boxwoods.


In a few years the boxwood hedge should fill out and will then be trimmed squarely together.

Here you can see a close up of the stamp and coloring we chose for the curbing. We pulled some of the coloring out of the brick in the front.


In the spring, we get a nice little touch of color, so pretty:


Since spring has arrived, it has been so much fun to watch things grow. And the best part of all is how low maintenance the landscaping has become. I’m hoping we’ll get a return on our investment in the future! I'll be linking this post to "Metamorphosis Monday's" over at Between Naps on the Porch. Be sure to pop over there to see tons of great before & afters!! I will also be participating in the "Bring In The Spring!" party over at Posh Pieces, you can head over there for some serious spring inspirations!


Related Posts with Thumbnails
 

© 2010-2017 Nancy Marcus. All Rights Reserved. | Blog Design By Brittany Douglas